Door hardware, kitchen cabinetry, timber gates, outdoor timber, balustrades and awning windows in Brisbane. Compare the recorded work, then call Ella on 0416 614 281 with your suburb and photos to discuss the repair scope.
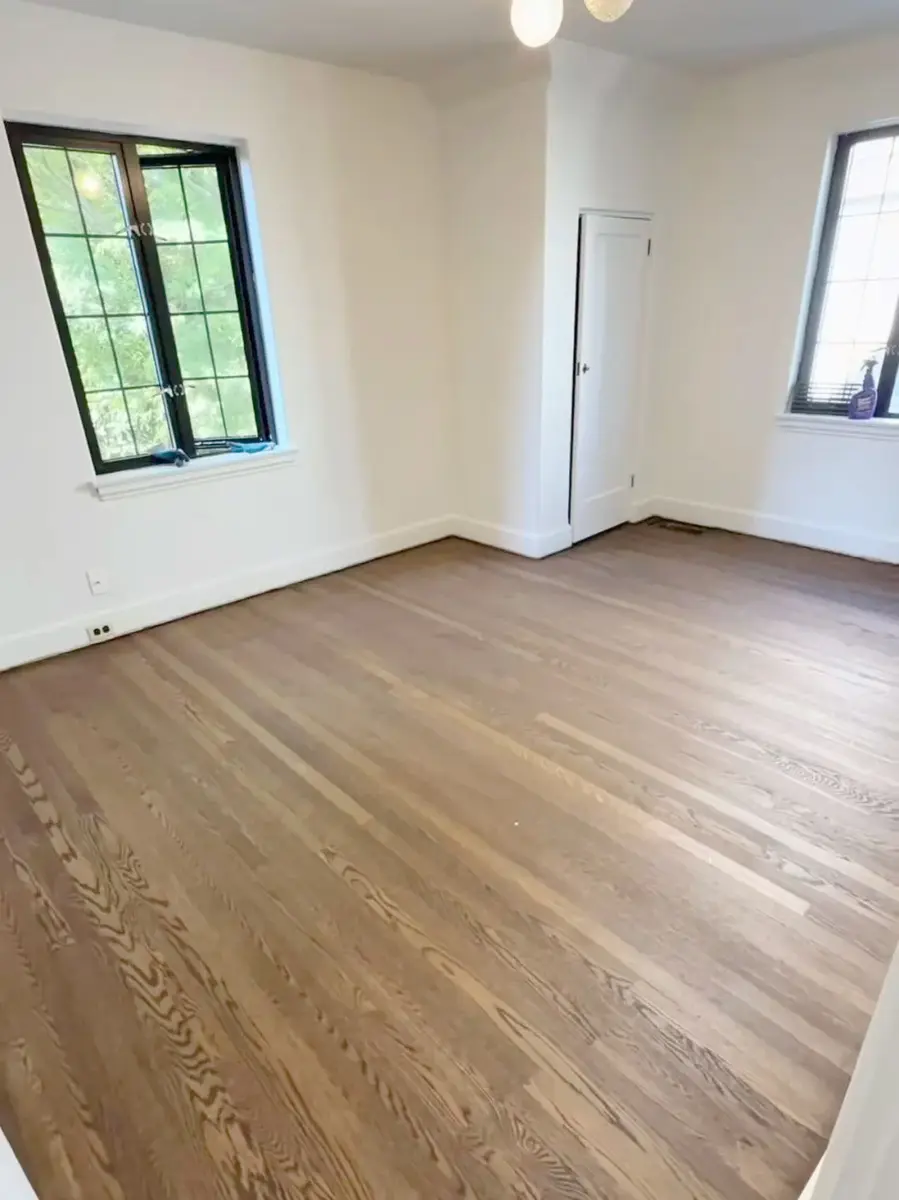
Completed timber flooringA clean, light floor finish that lifts a compact room.
Selected real work
See the problem, then the finished result
Each repair is kept together as one project, with before and finished views side by side where both are documented. The shelf close-up shows fixing detail only.
Door lock installation case
Existing Door Opening & Smart-Lock Fitting
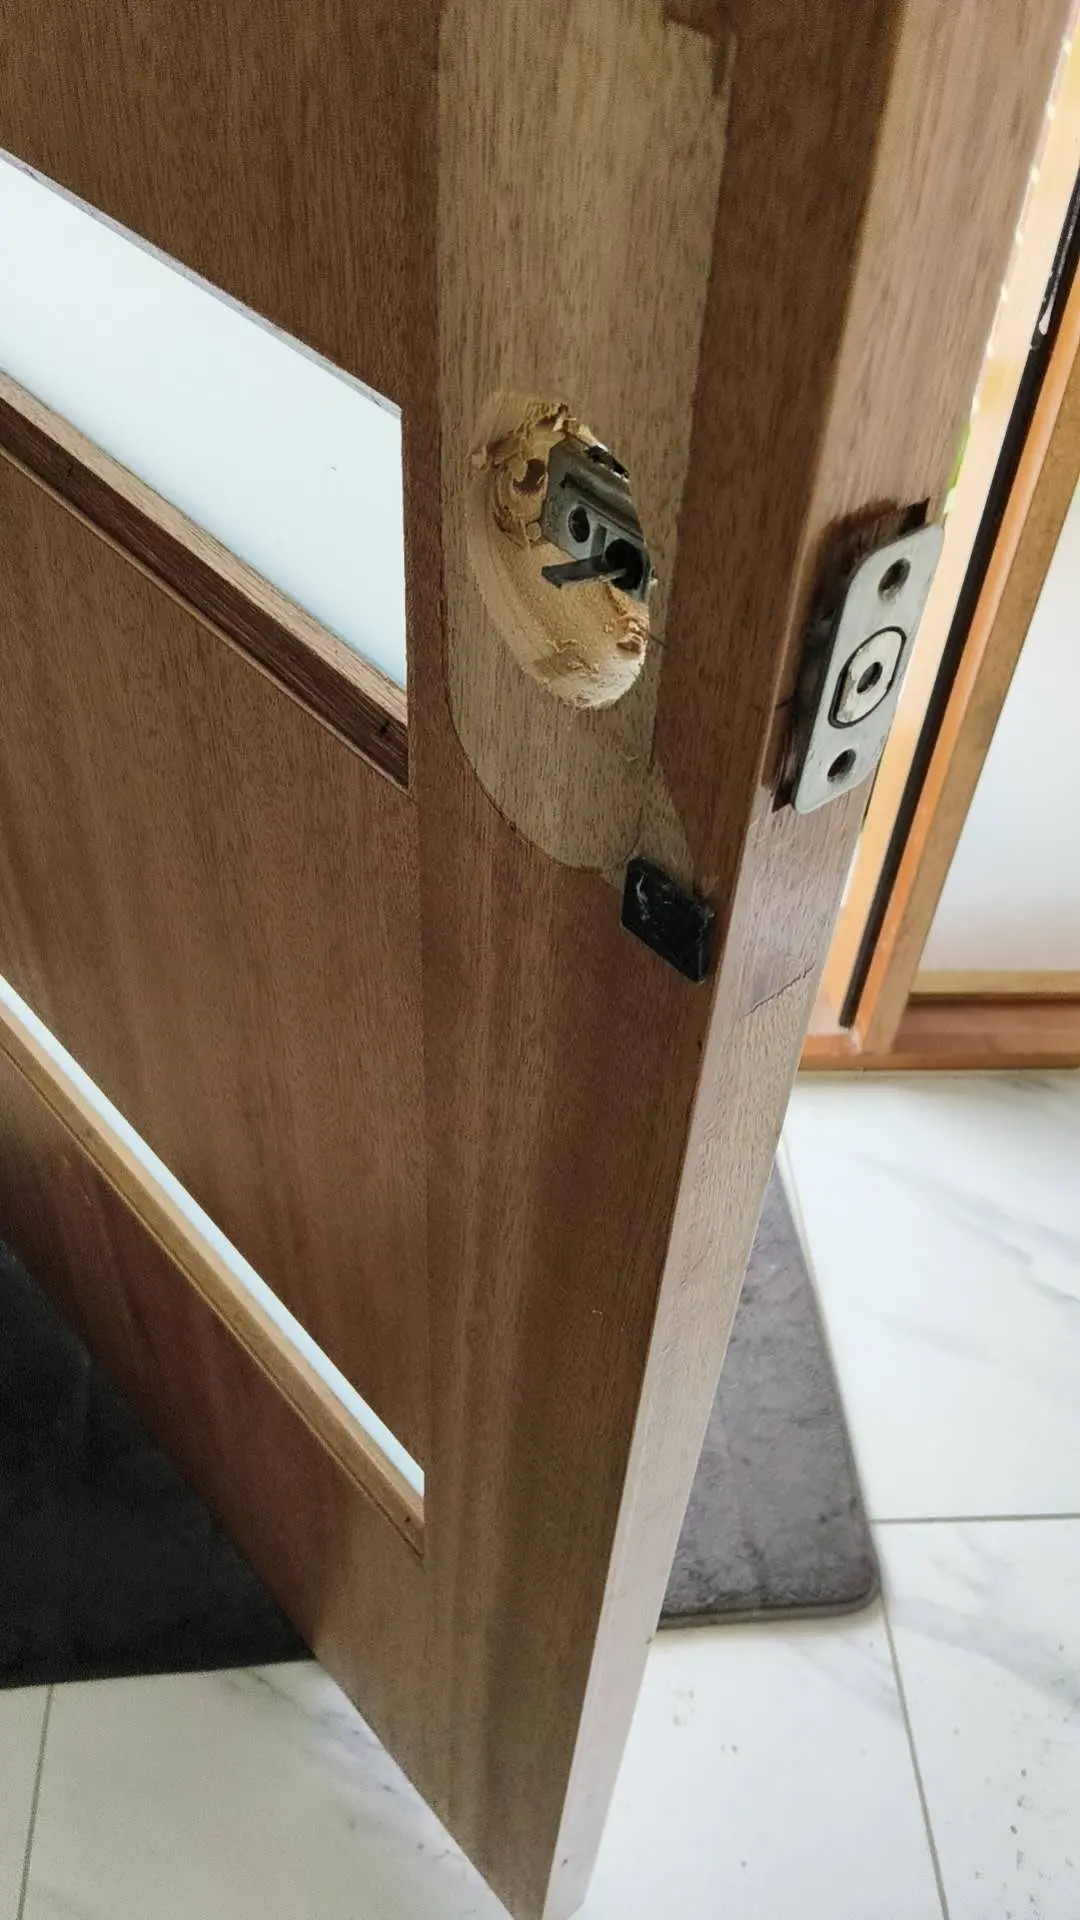
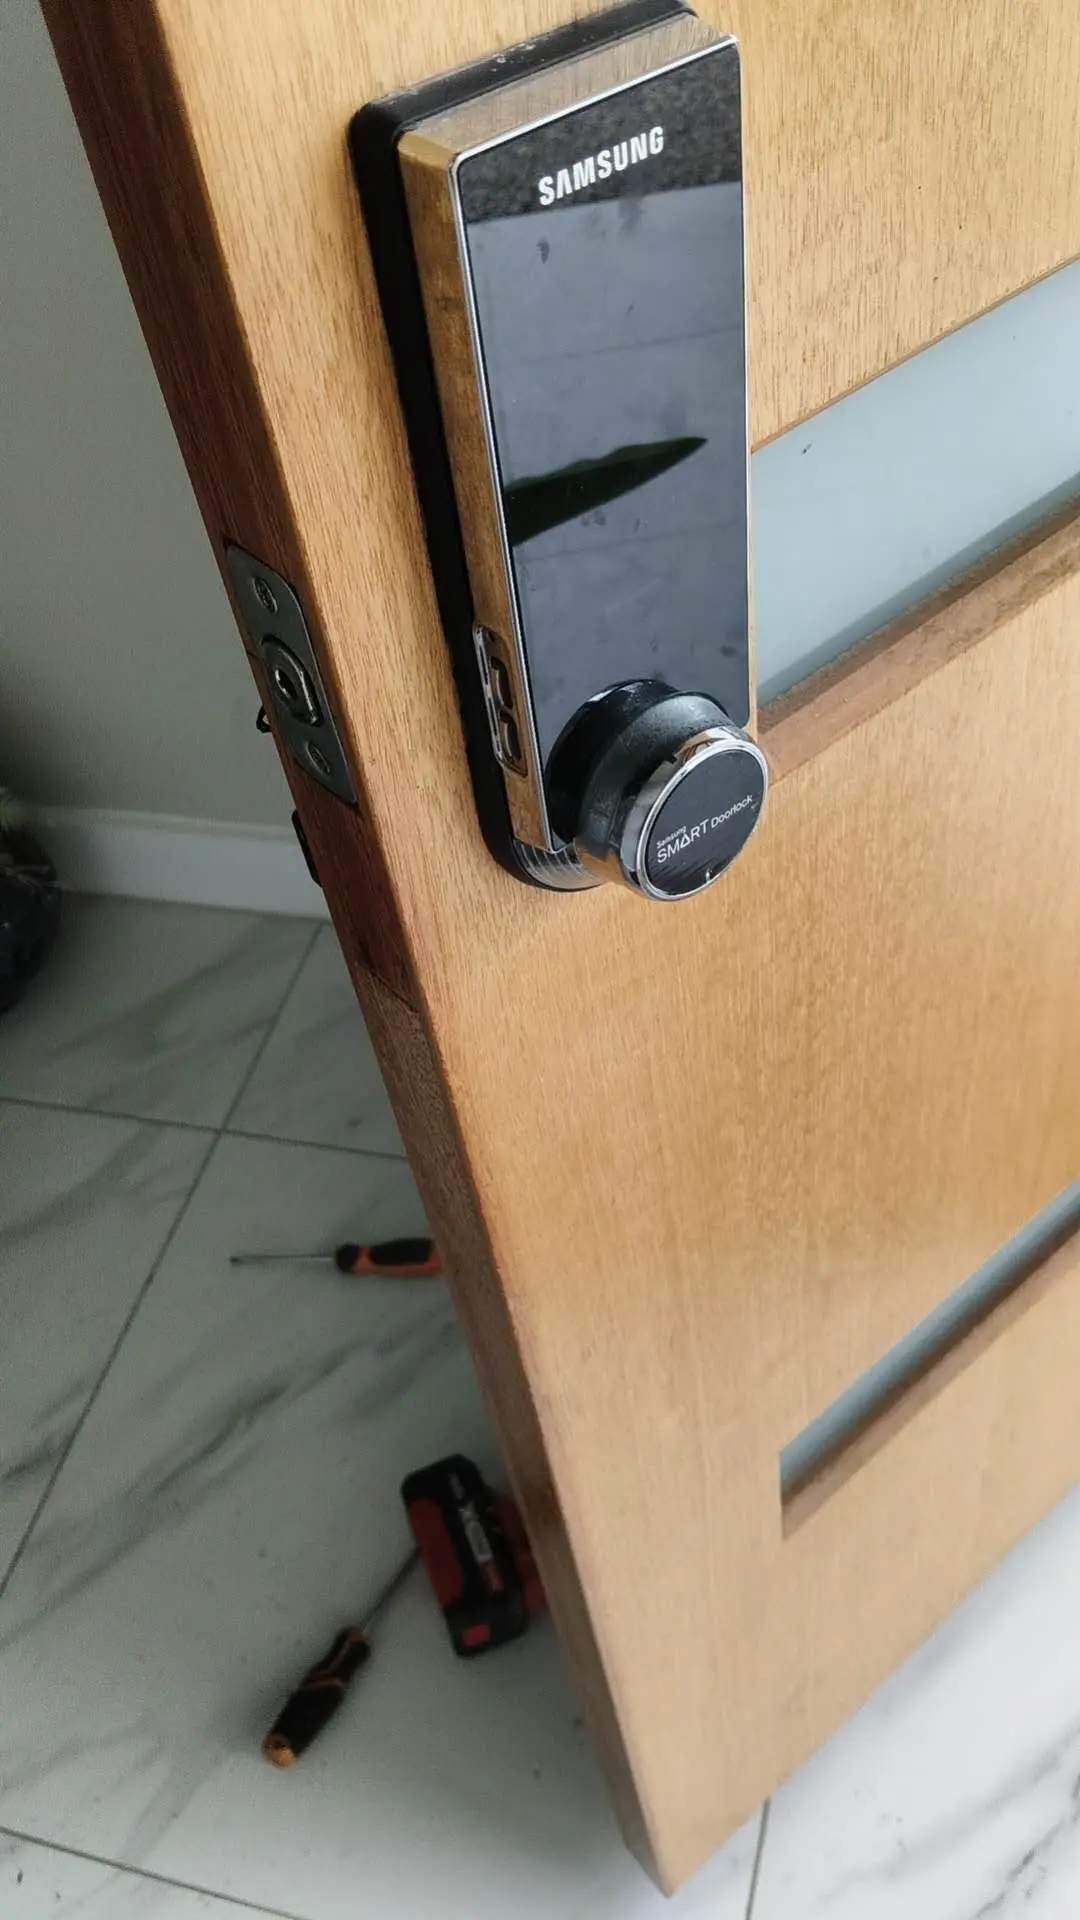
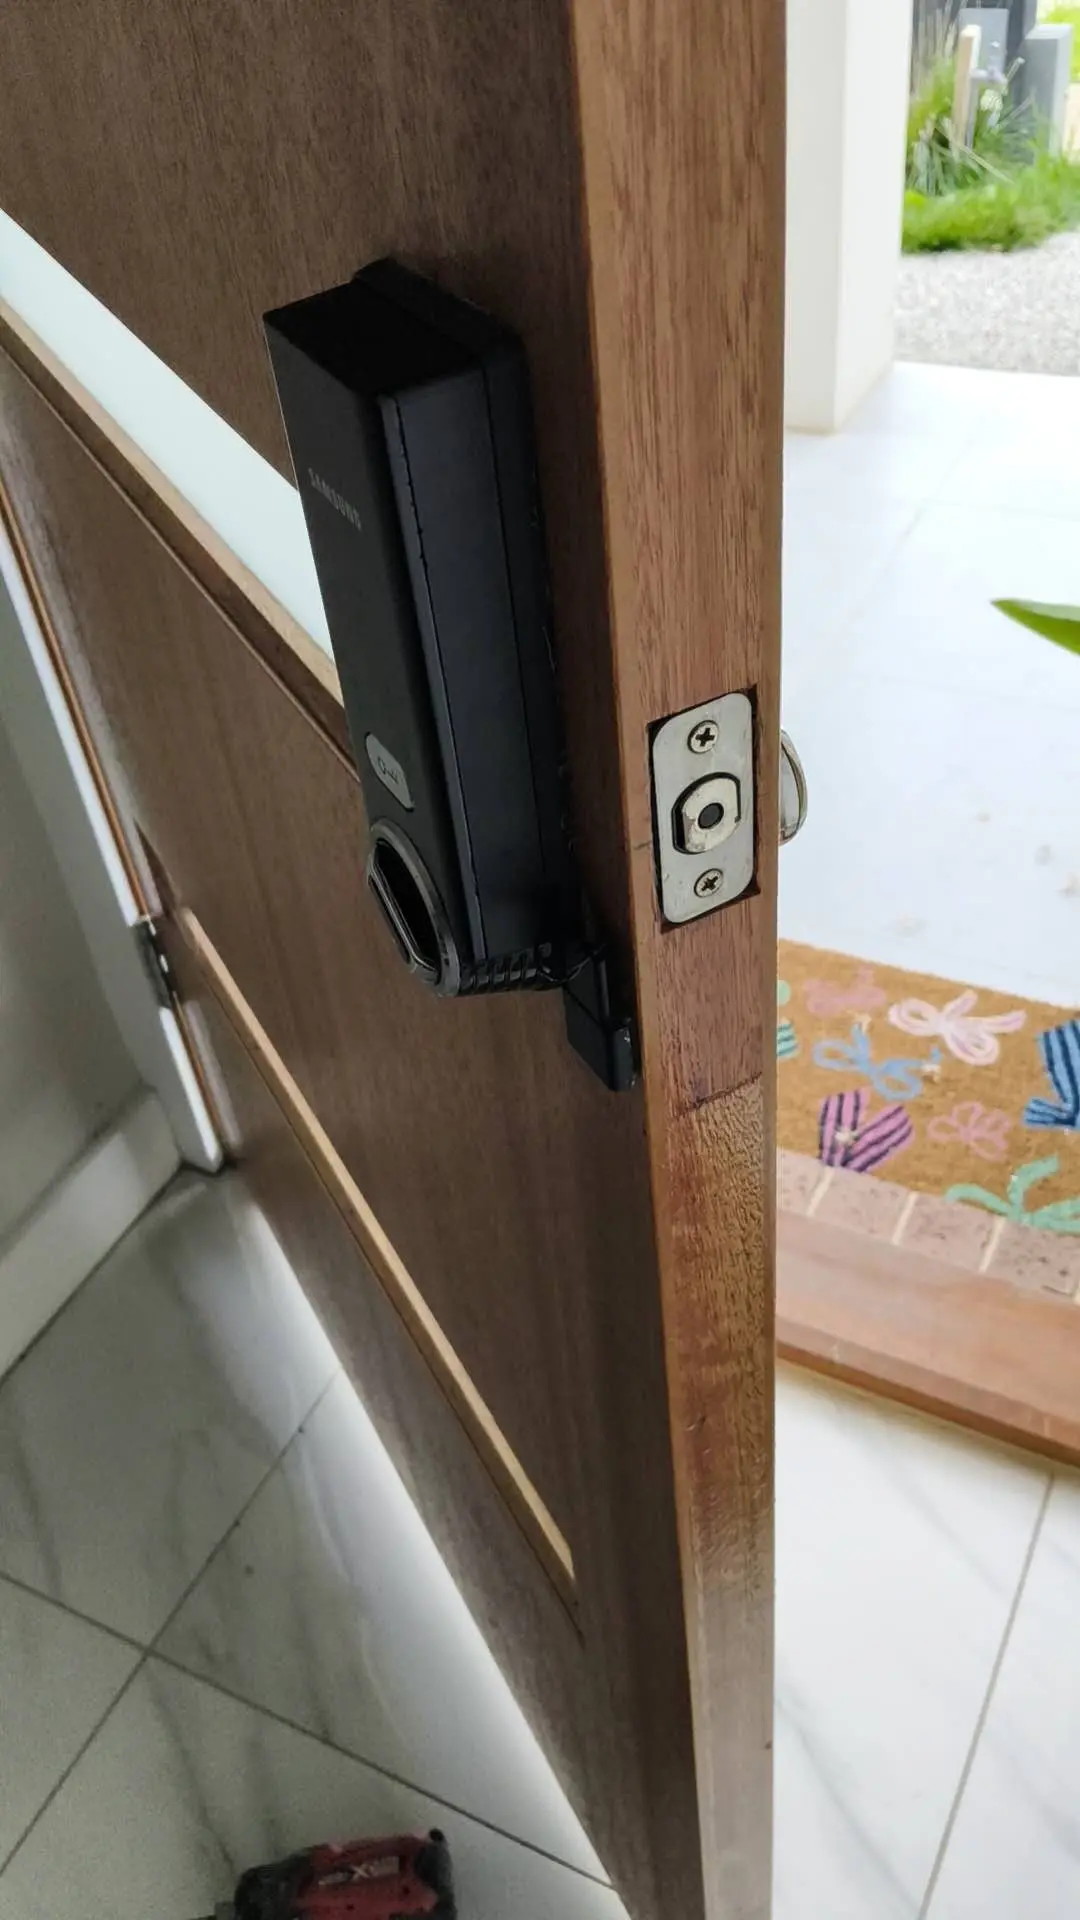
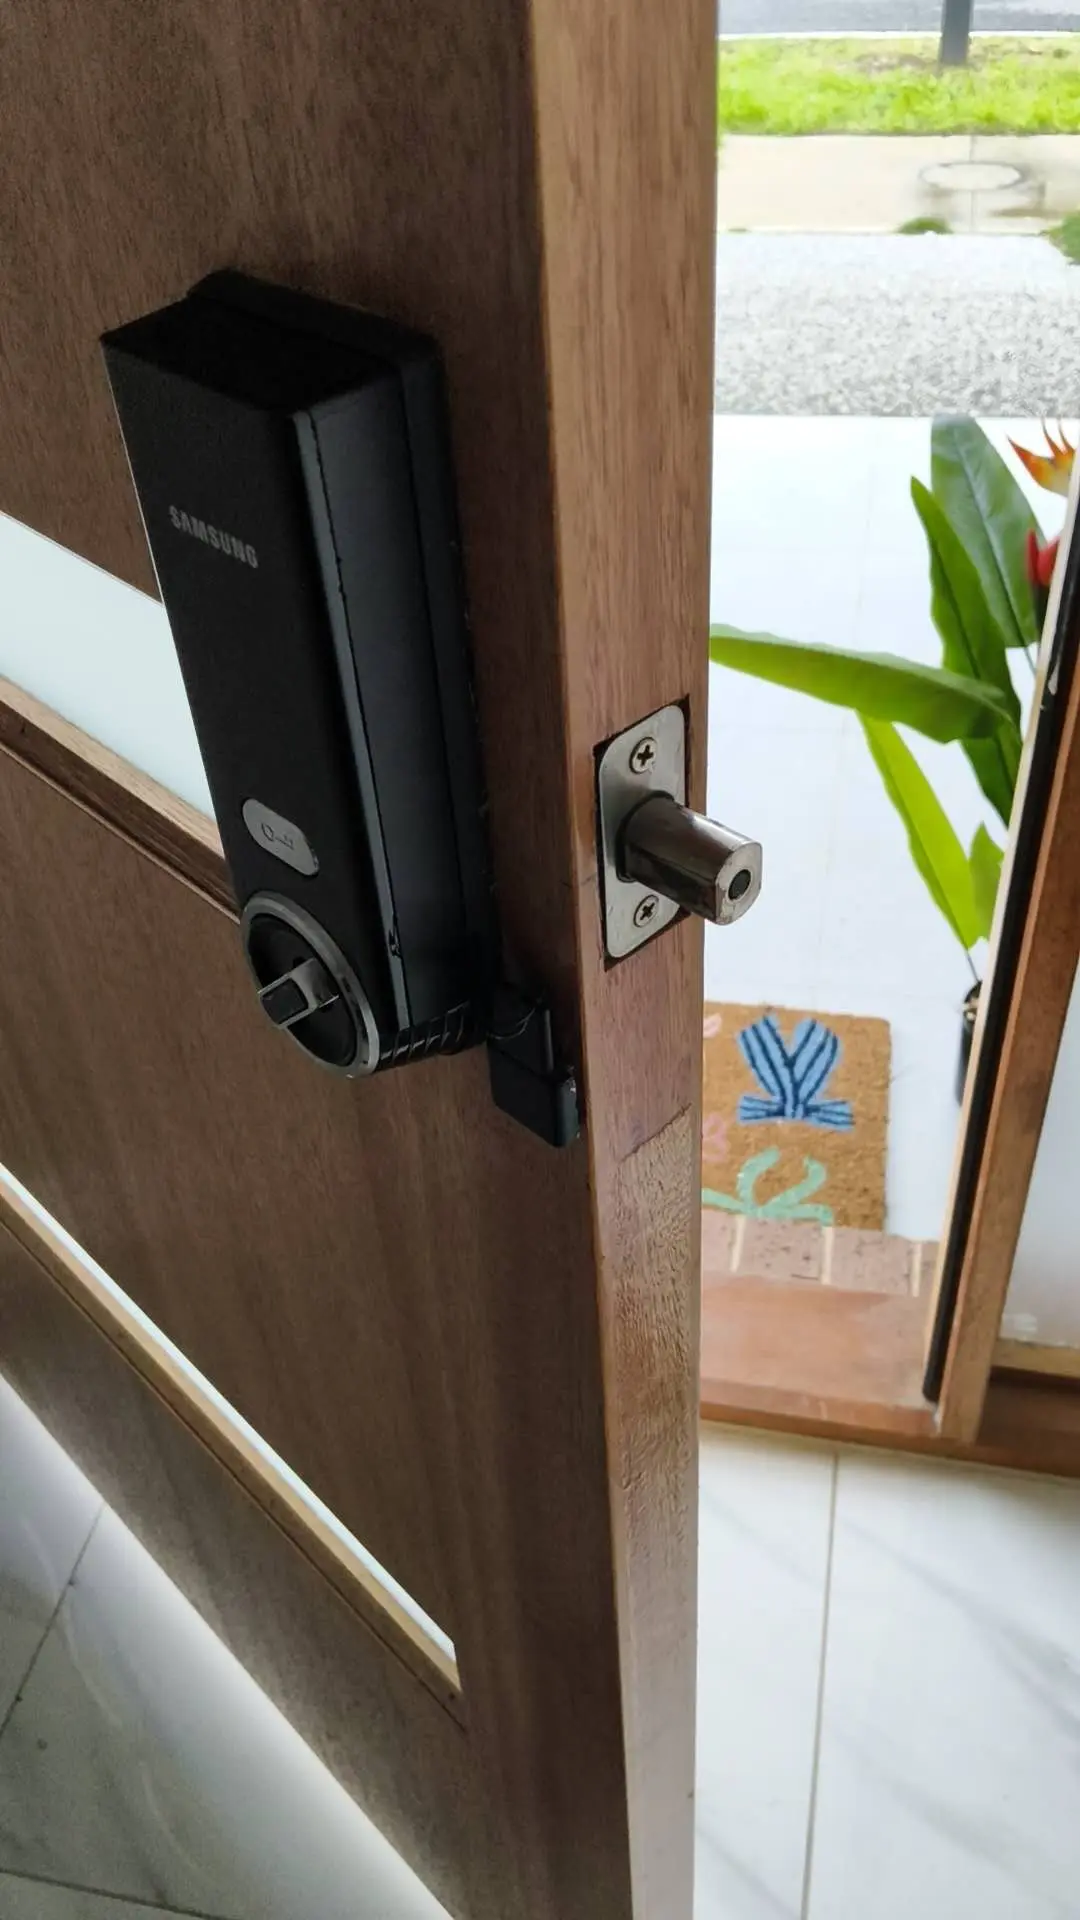
The before view shows chipped timber around the existing lock opening. The completed exterior and interior views show the smart-lock body, latch and extended bolt fitted and aligned on the retained timber door.
Before fitting
Pre-existing chipping around the lock opening
The existing opening and chipped timber before the replacement hardware was fitted.
Before fitting
Before: chipped timber around the existing lock opening.
Completed fitting
Smart-lock hardware fitted and aligned
The finished view shows the exterior keypad fitted to the existing timber door.
Completed fitting
Exterior smart lock fitted and aligned on the timber door.
Completed fitting
Interior lock body and latch hardware installed and checked.
Completed fitting
Completed interior fitting with the deadbolt extended for a final hardware check.
What this case demonstratesA neat smart-lock installation aligned with the existing door opening and hardware position.
The before views show upper-door hinges, loose drawer fronts and internal cabinet panels. We refitted the existing fronts, adjusted hinges and aligned the doors and drawers. The completed views show straighter gaps on the upper, base and tall cupboards and the refitted drawer fronts.
Before
Hinges, doors and drawer fronts before repair
Hinges, doors and drawer fronts before refitting and alignment work.
Before repair
Upper cabinet door before hinge and alignment work.
Before repair
Concealed hinges inspected before the cabinet door was realigned.
Before repair
Drawer fronts and internal panels before refitting and alignment.
After
Refitted components and final alignment checks
The after photos show doors and drawer fronts refitted, adjusted and checked for straighter gaps.
After repair
Upper cabinet doors refitted and aligned after the repair.
After repair
Base cabinet doors refitted and checked for more even gaps.
After repair
Drawer fronts reinstalled and aligned during final checks.
After repair
Tall cabinet doors adjusted for a straighter meeting gap before final touch-up.
What this case demonstratesCabinet door adjustment, hinge work, drawer-front refitting and alignment checks on existing kitchen cabinetry.
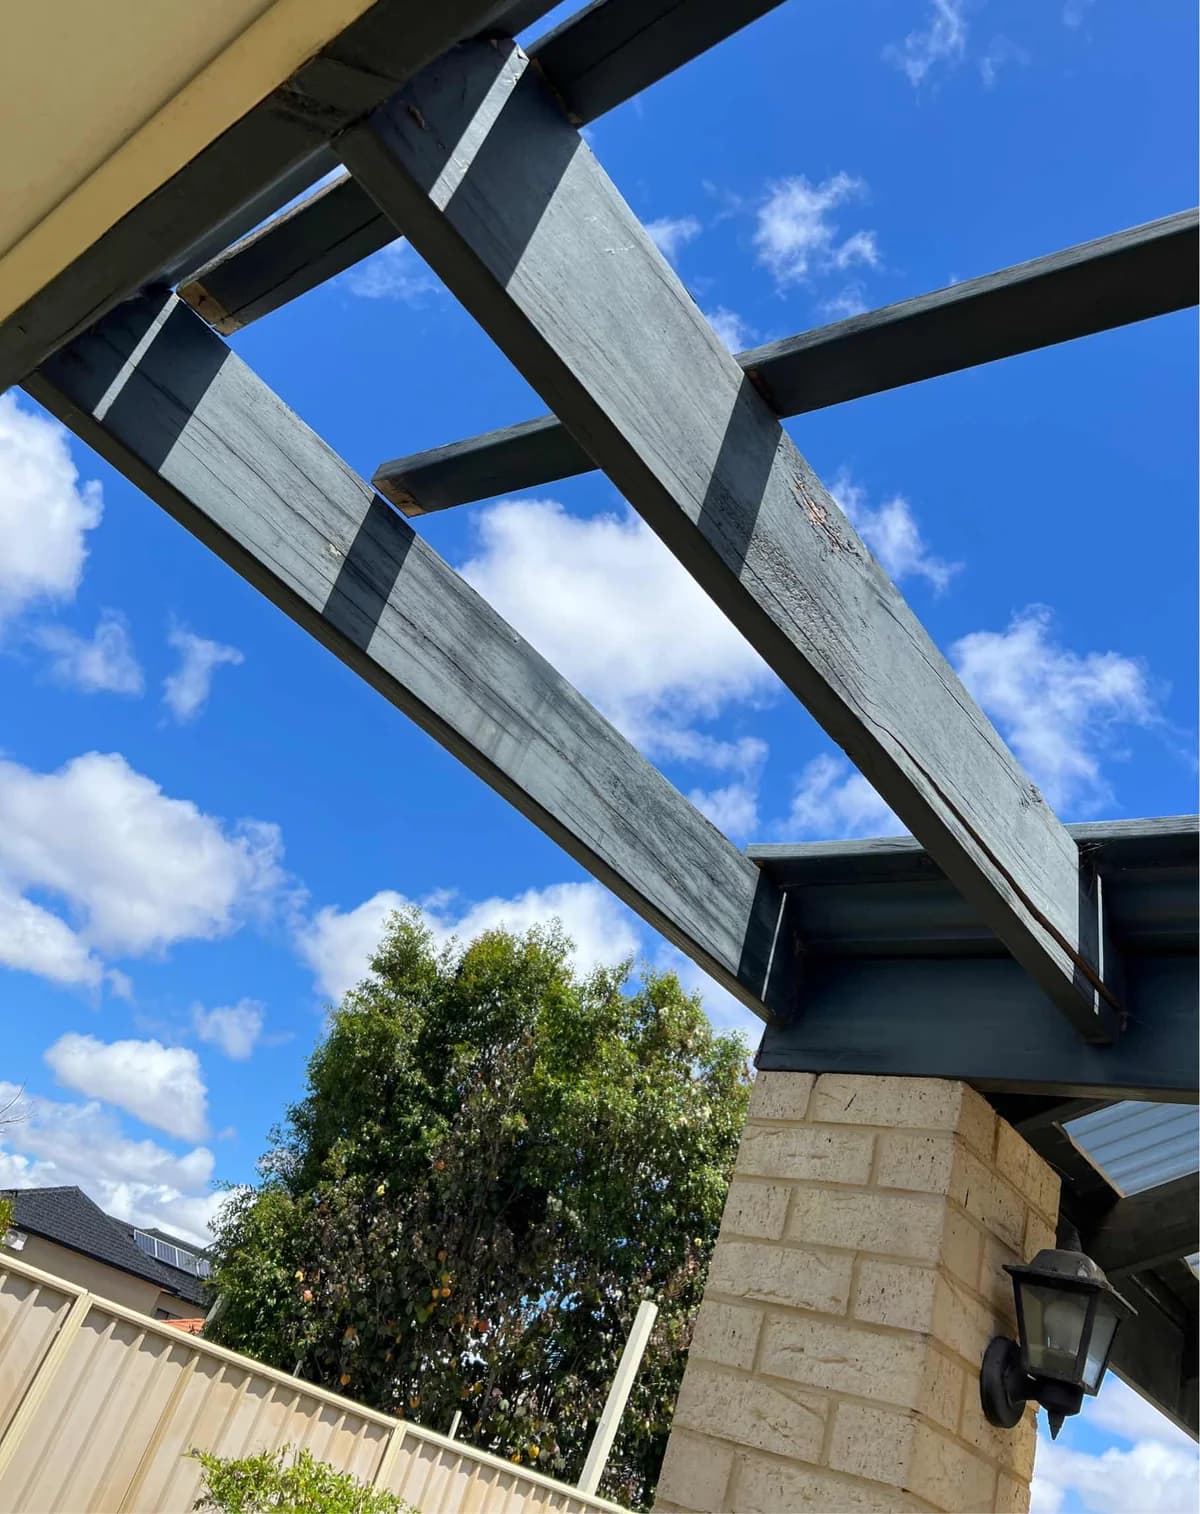
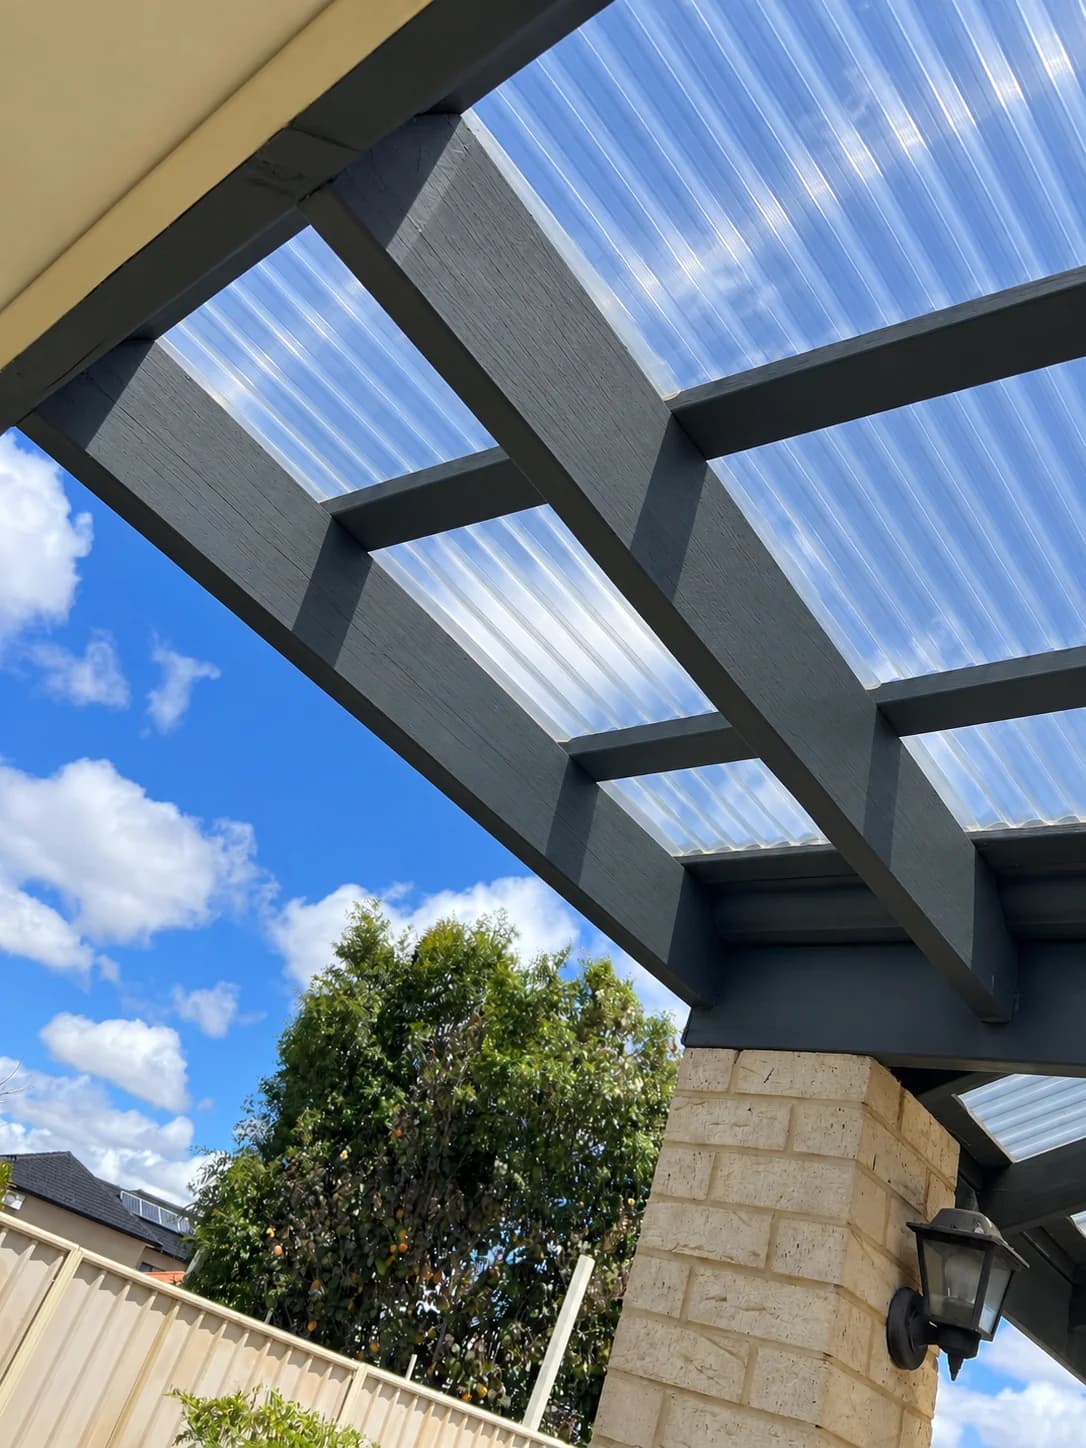
The before view shows split and weathered pergola timber. The completed view shows repaired timber in a charcoal finish and translucent roof sheeting over the same structure.
Before
Split and weathered pergola timber
Weathered and split timber members before the repair work.
Before
Weathered and split timber members before the repair work.
After
Repaired timber and completed roof covering
Repaired and refinished timber with translucent roof sheeting fitted.
After
Repaired and refinished timber with translucent roof sheeting fitted.
Finished resultThe visible finished view shows renewed timber appearance, a consistent charcoal surface and the fitted translucent covering. Structural condition and a coating specification are not inferred from appearance.
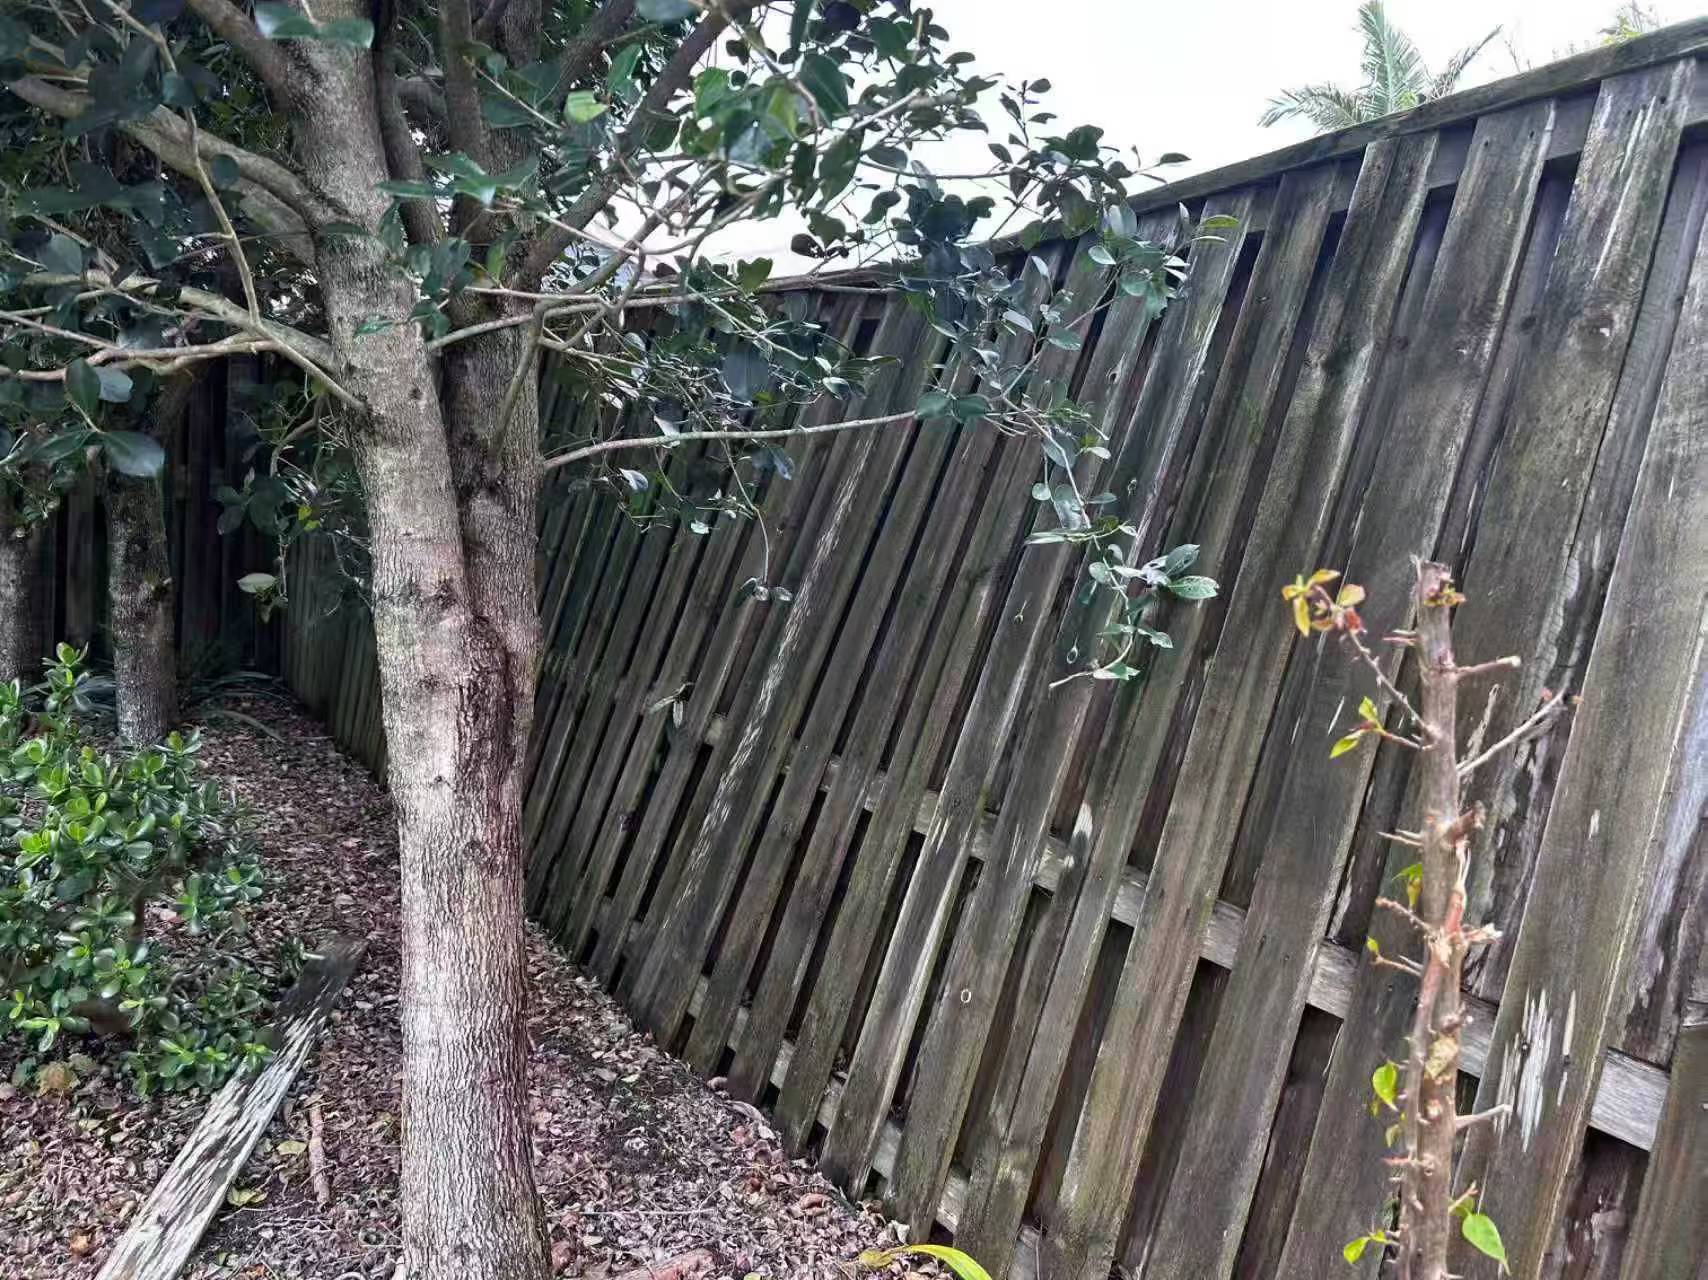
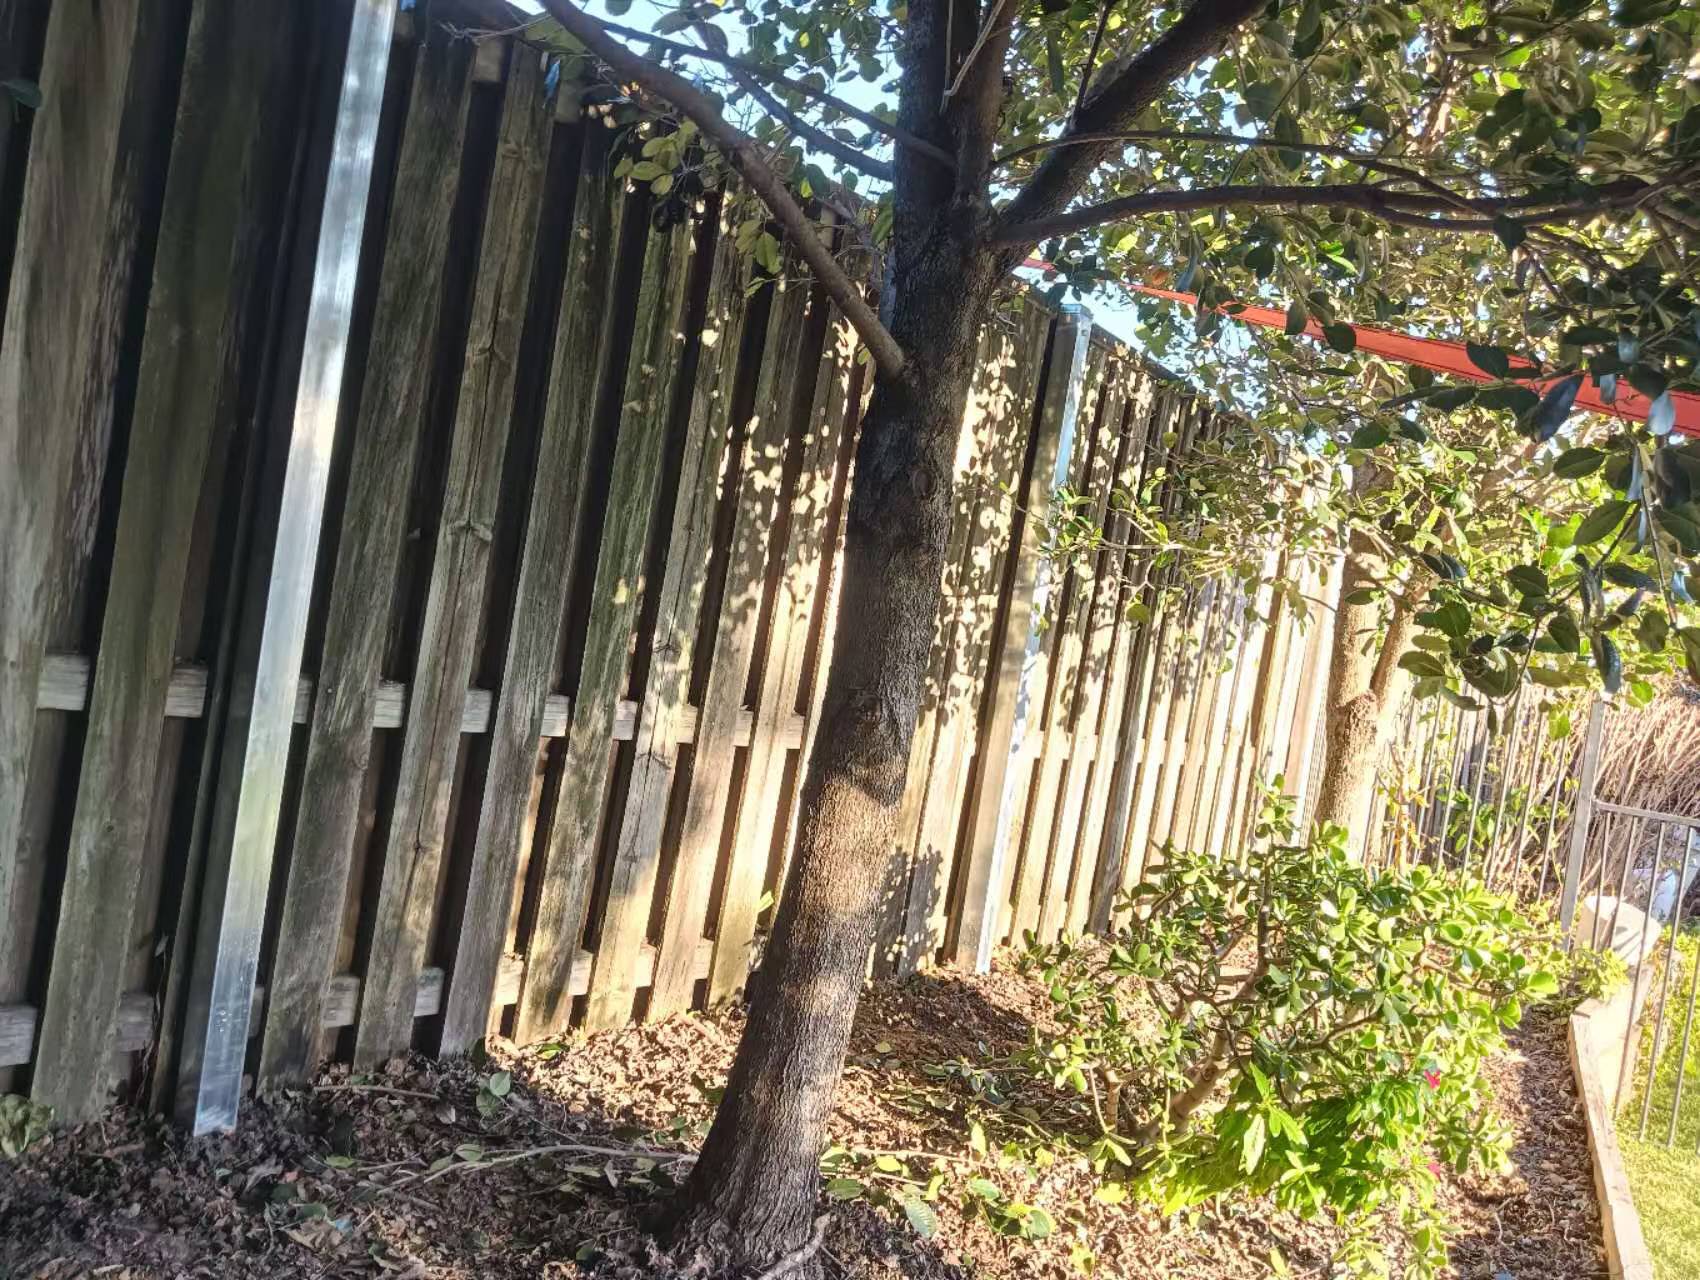
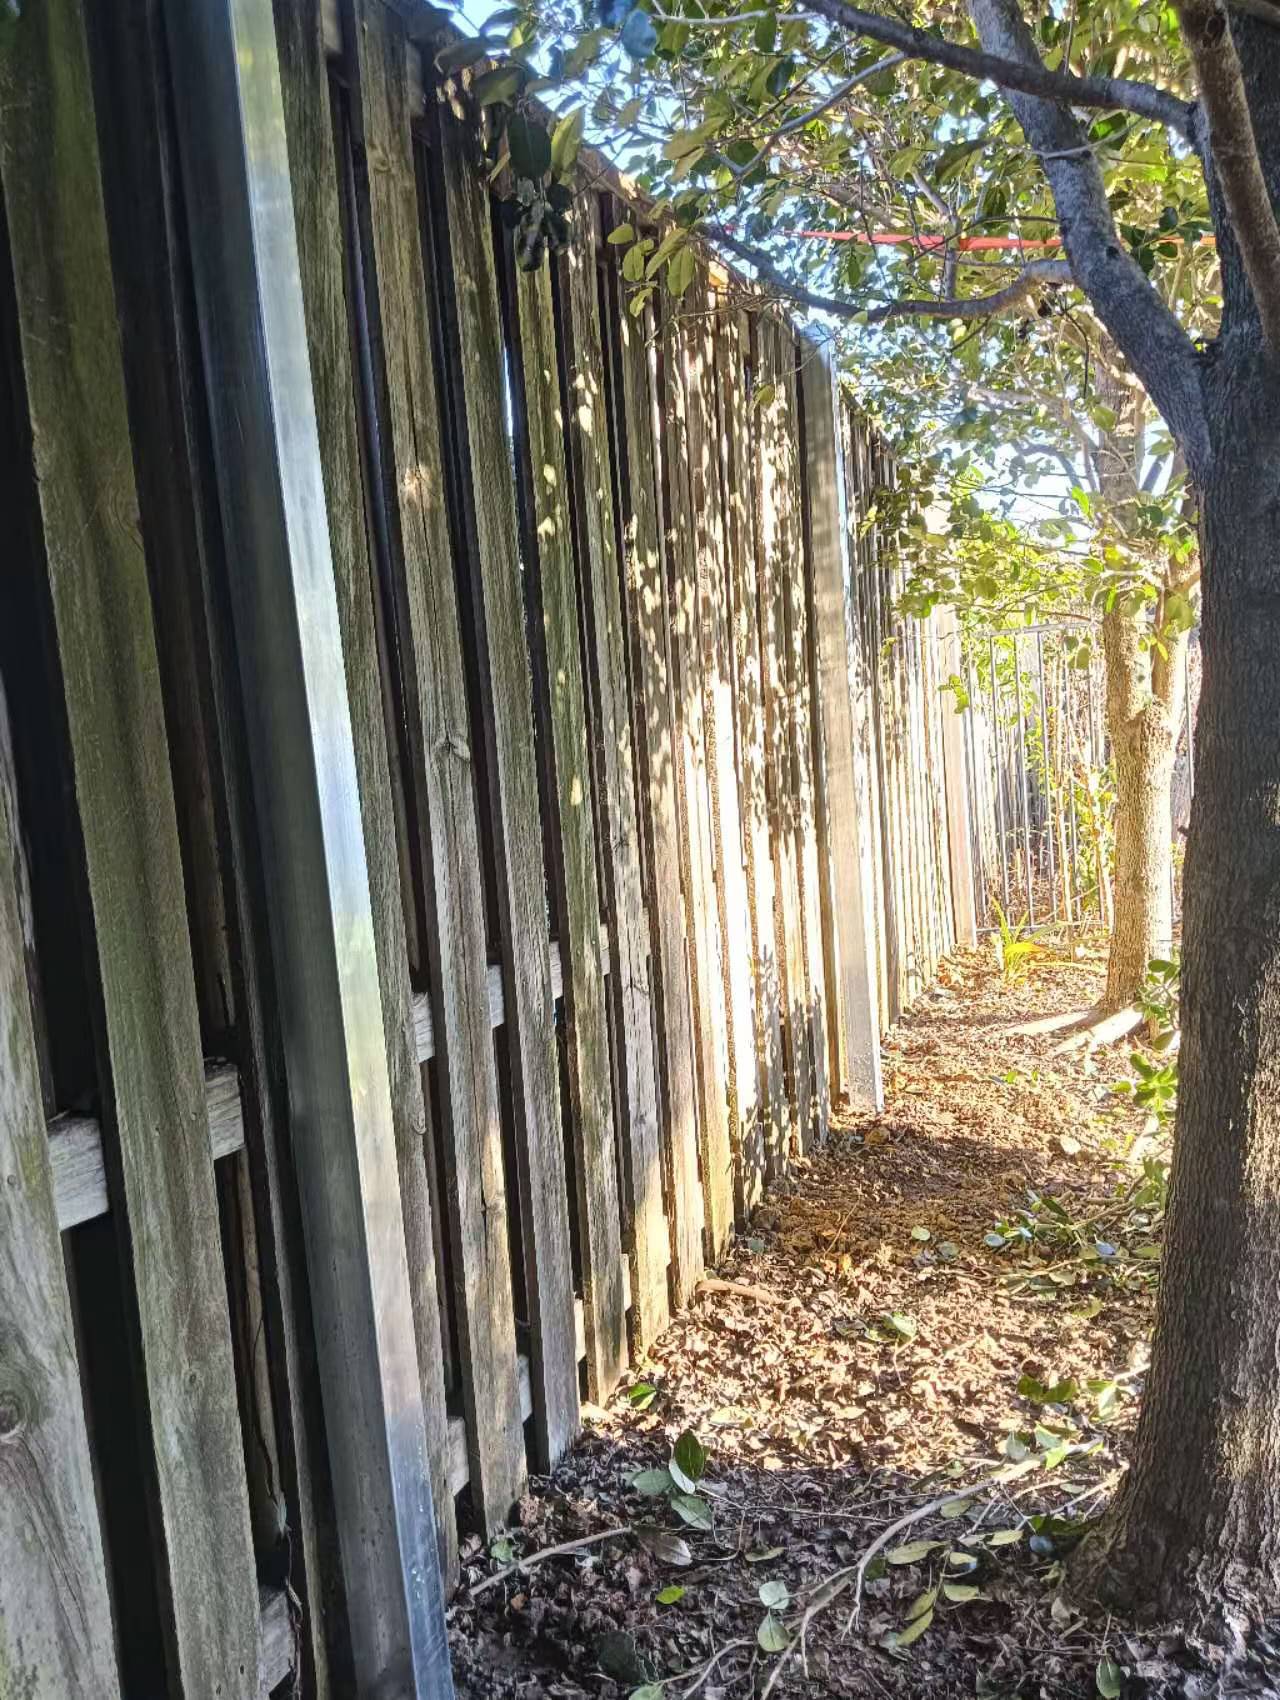
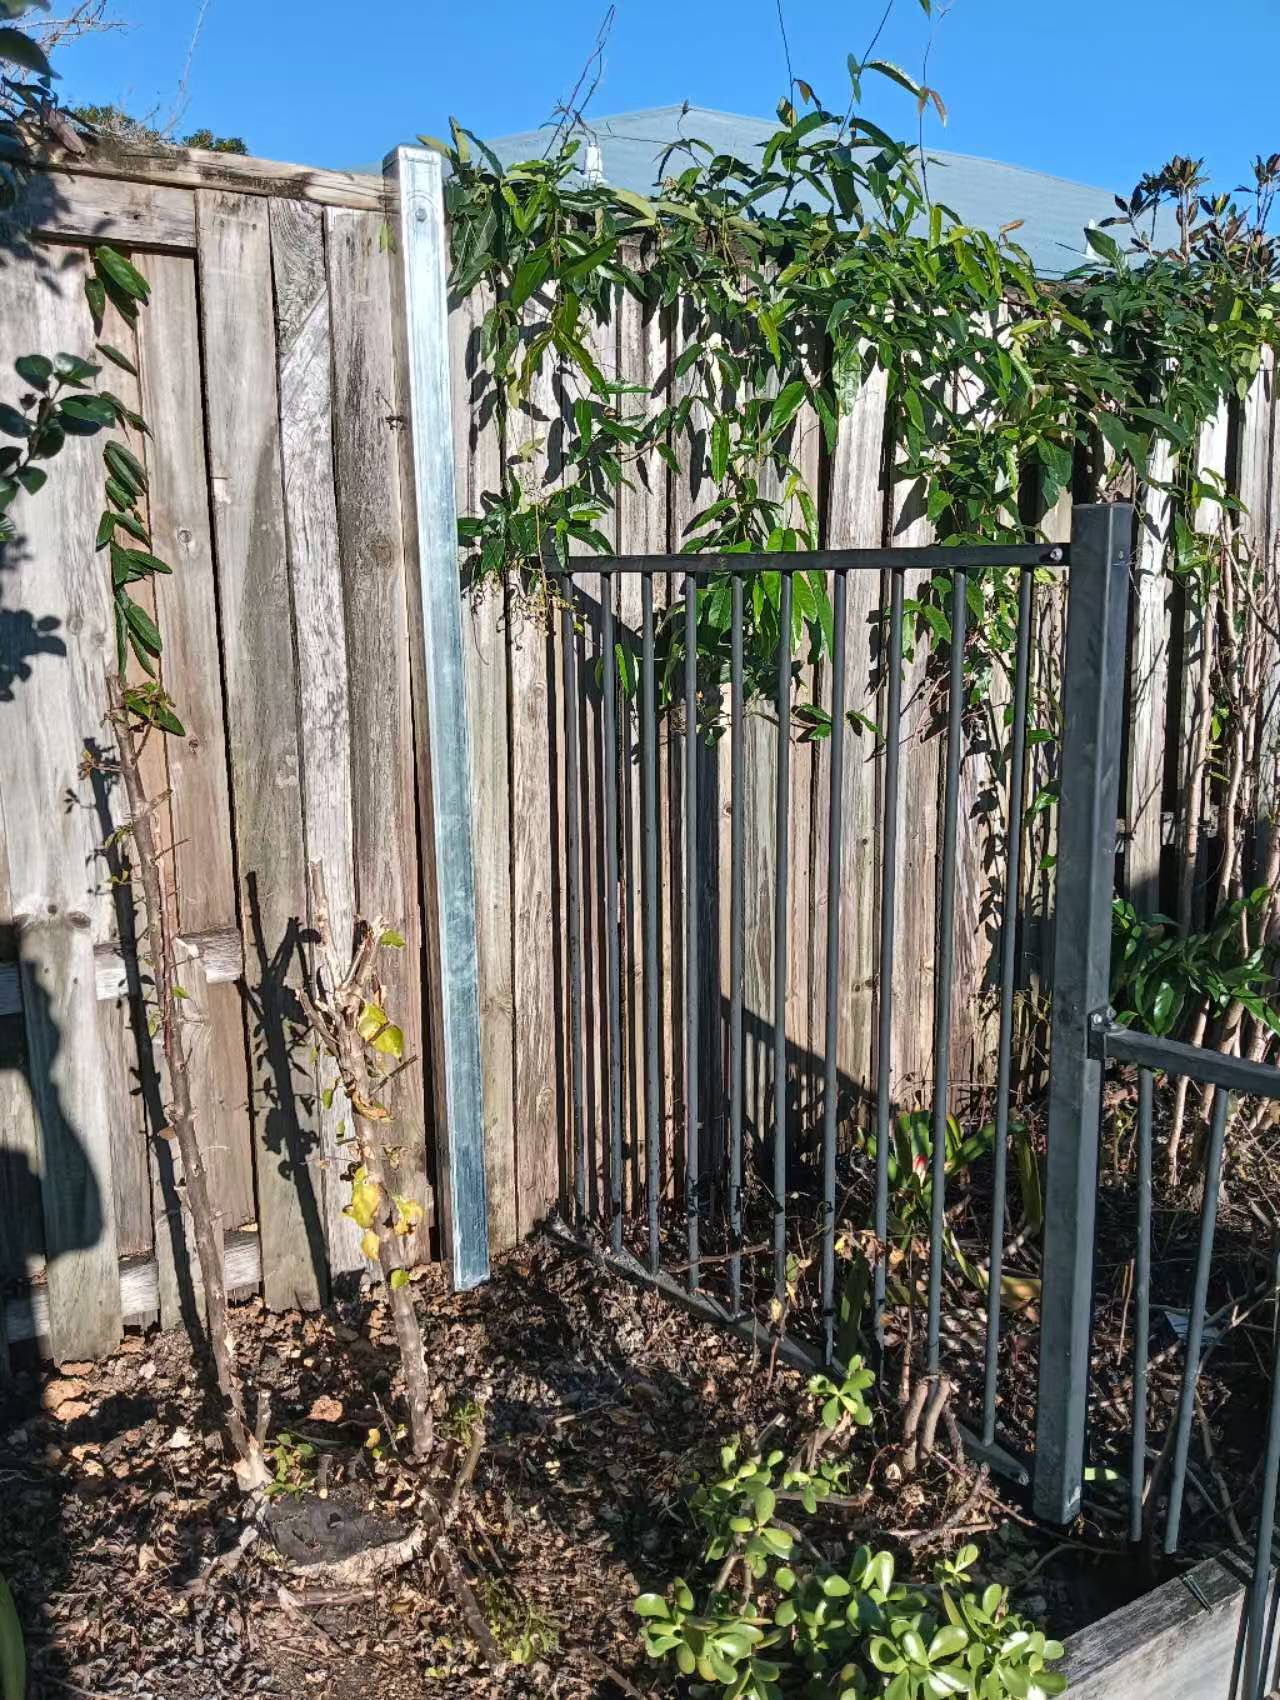
Existing timber fence supported with added steel posts
The first view records the timber fence leaning beside the garden trees. The recorded repair straightened that fence, retained the timber run and added steel support posts. The other three views show those posts along the retained fence and beside the existing gate. They document the support arrangement visible above ground, without supplying footing dimensions or a hidden connection design.
Added support is an option to assess where the existing timber can be retained. Widespread decay, failed rails or unsuitable ground conditions may require a different repair or replacement scope. The post design and fixing method need to suit the actual site.
Plan the repair around the cause
If a fence repeatedly moves after heavy rain or strong winds, explain when it happens and what has been repaired before. Photos help start the conversation; the timber, posts, connections and ground still need checking before the work is agreed.
Door condition and a covered walkway, recorded on site
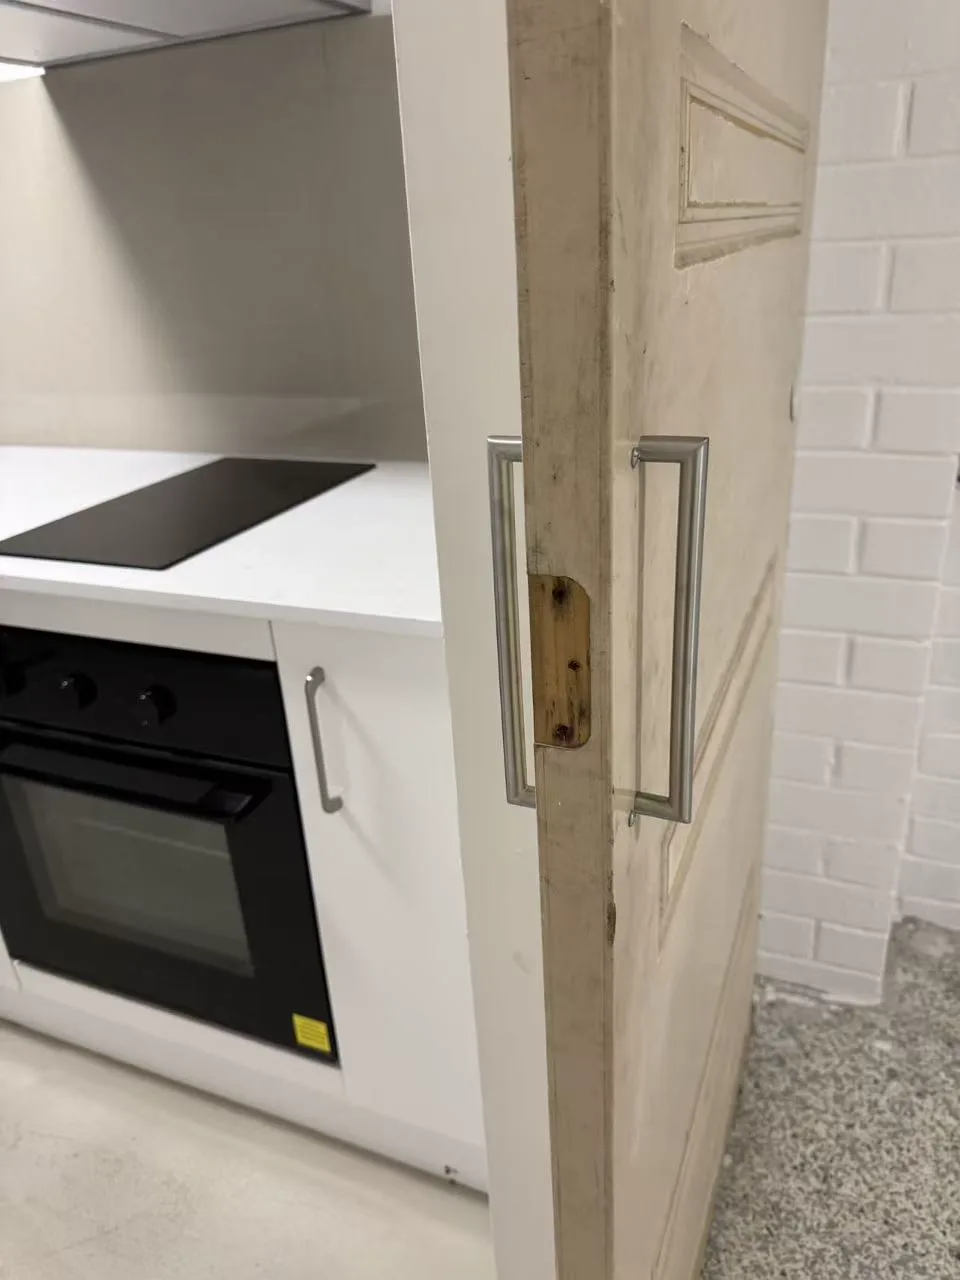
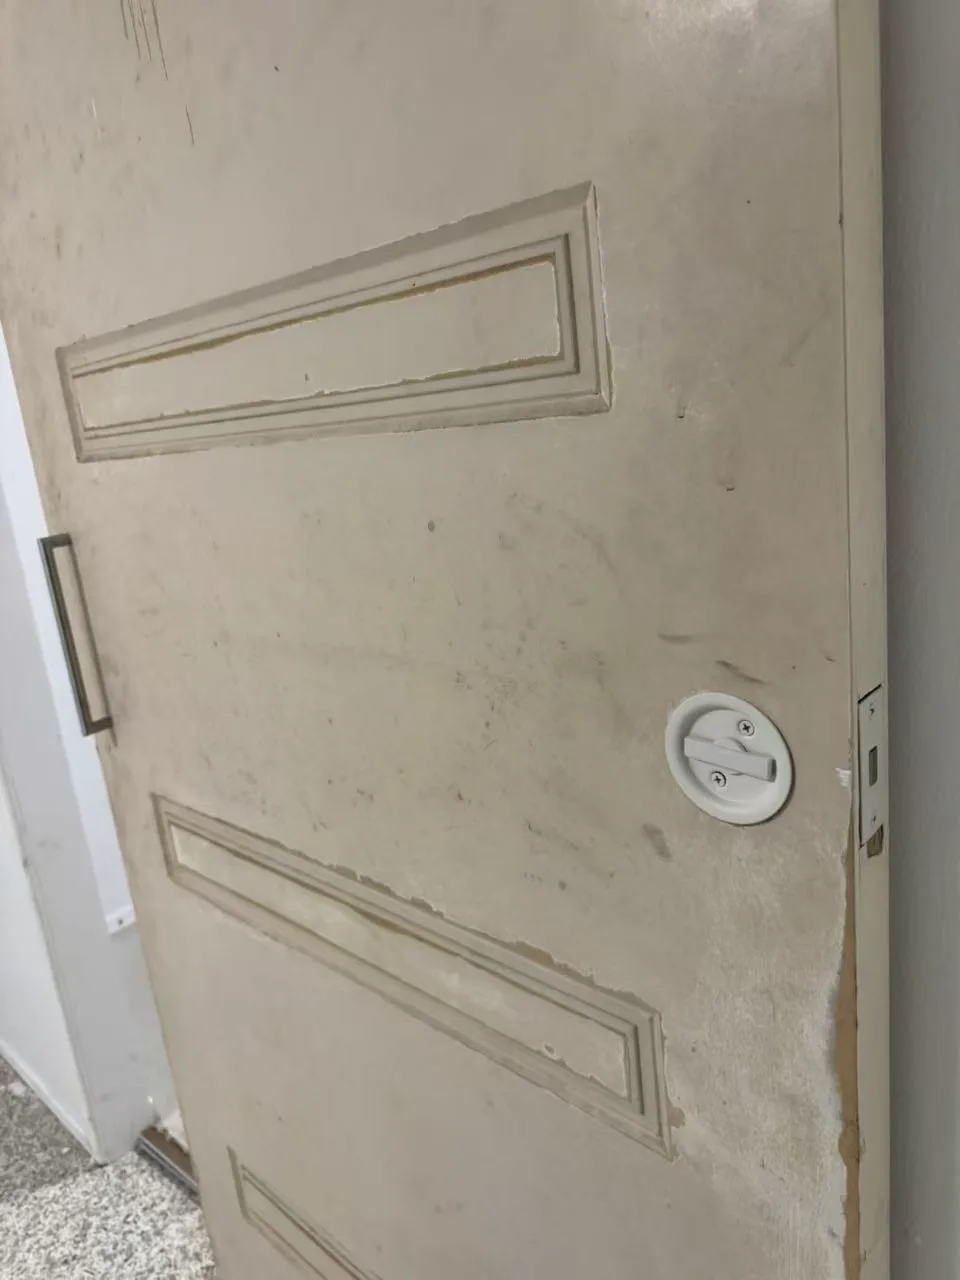
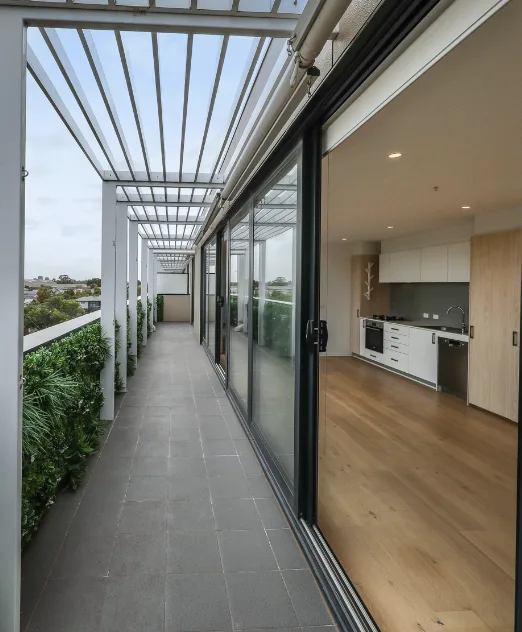
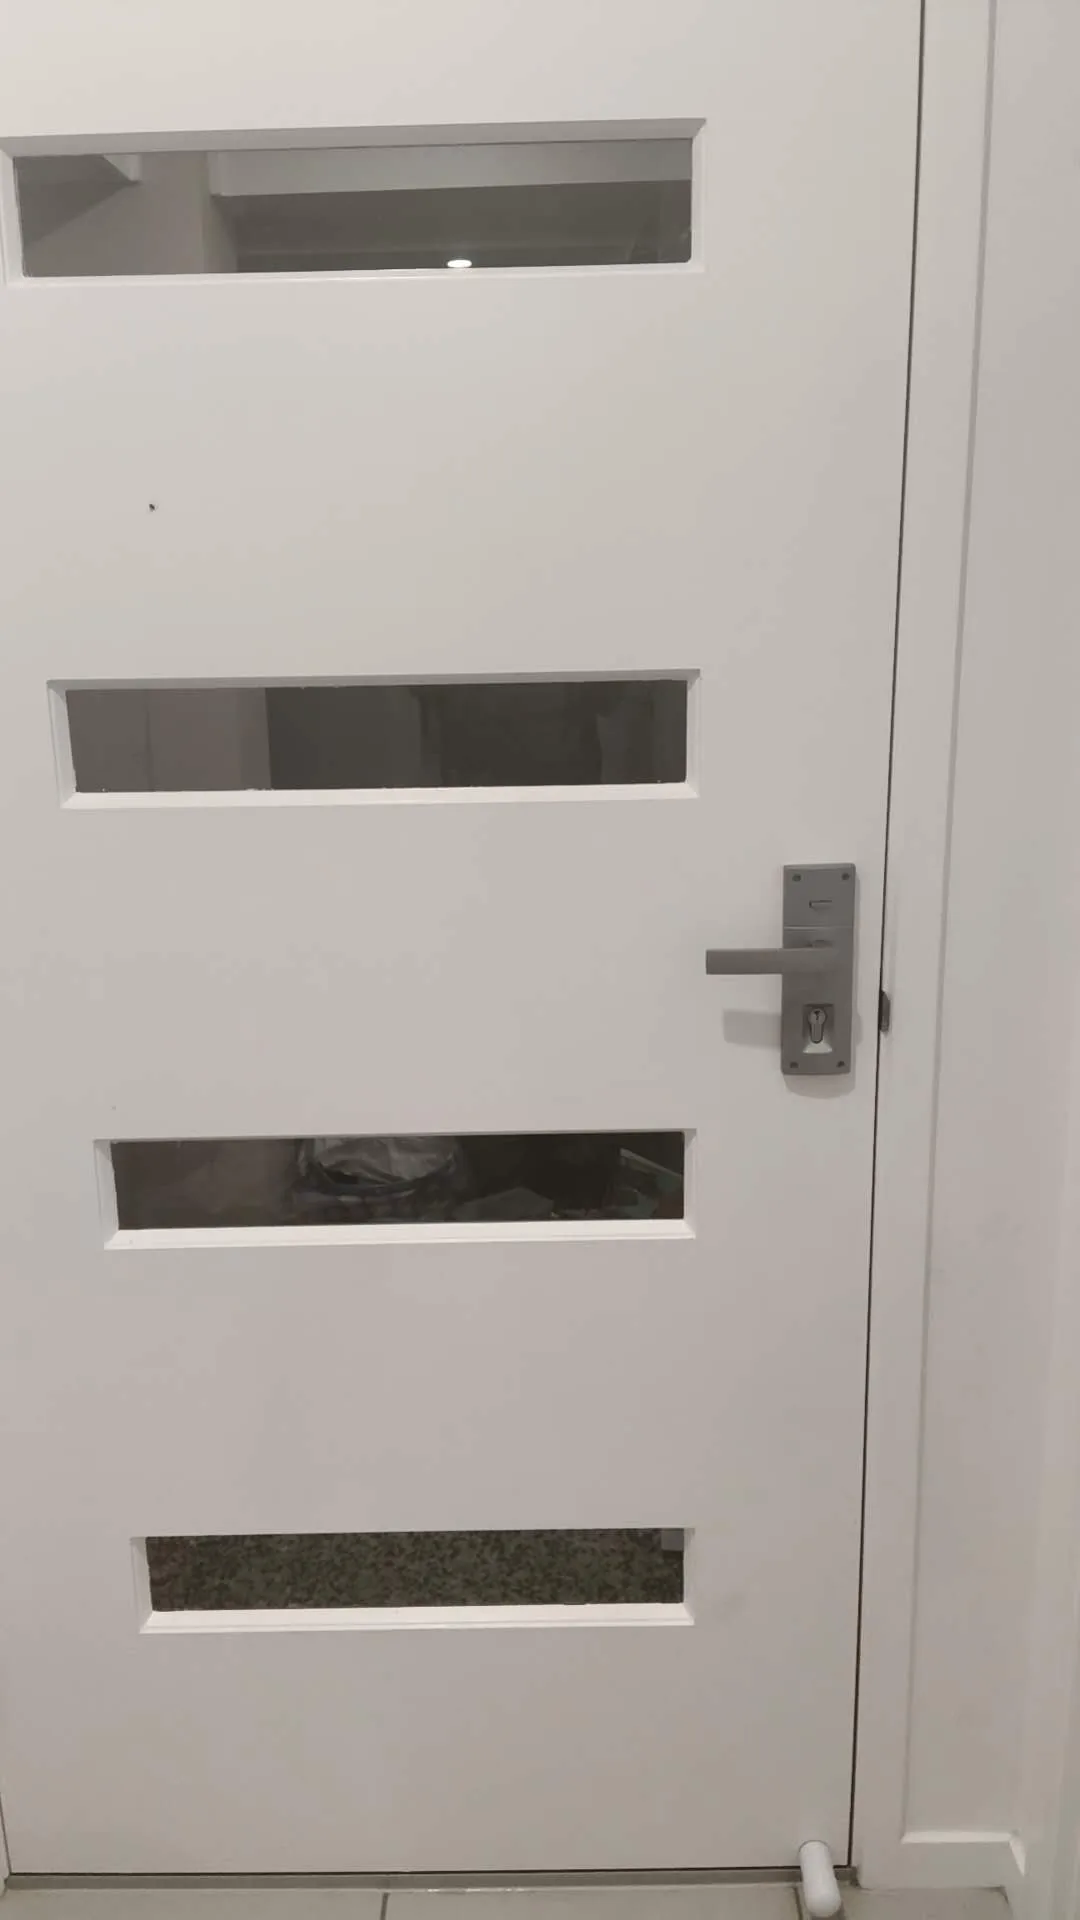
The door views record the existing condition of a panelled timber door before any repair is agreed: worn and flaking paint at the stiles and around the lock, with the door edge exposing bare timber. The walkway view records a completed steel-post structure with glazed roof panels beside a sliding door.
Existing door
Existing timber door with stainless pull handles, opening beside a white kitchen cabinet and oven. The paint film is worn through at the stiles.
Detail
Flaking paint across the raised panels and around the round lock, with the door edge showing exposed timber.
Completed structure
A covered walkway with steel posts, glazed roof panels and planting, running beside a sliding door into the kitchen. Recorded as a completed structure; no before view is held for it.
What this record coversDoor condition, hardware and paint film on an existing door, plus a completed covered walkway. These are condition photos; no repair outcome is claimed for the door.
A white hinged door with four horizontal glazed panels, a lever handle and a key cylinder. The surrounding white frame and tiled threshold are also visible.
White door with four horizontal glazed panels, a lever handle, key cylinder and surrounding frame.
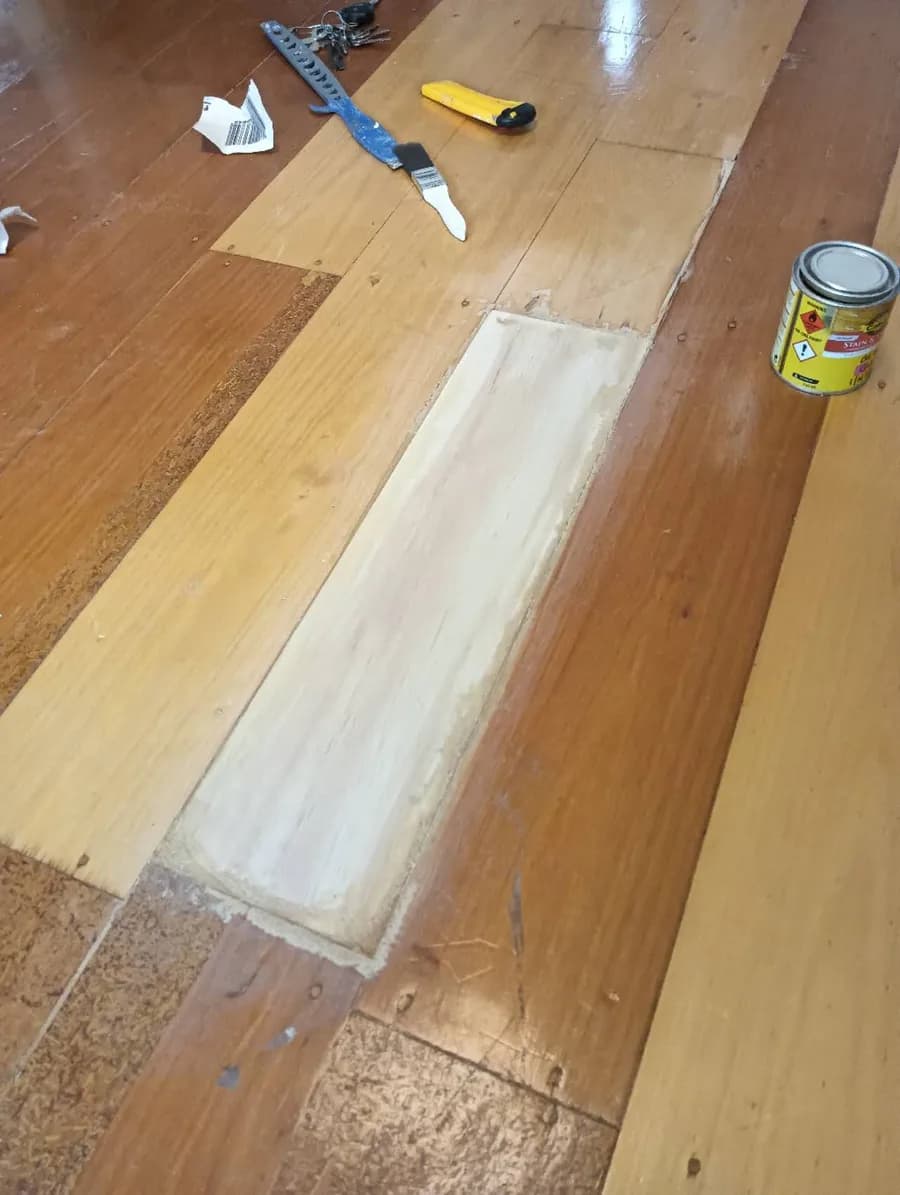
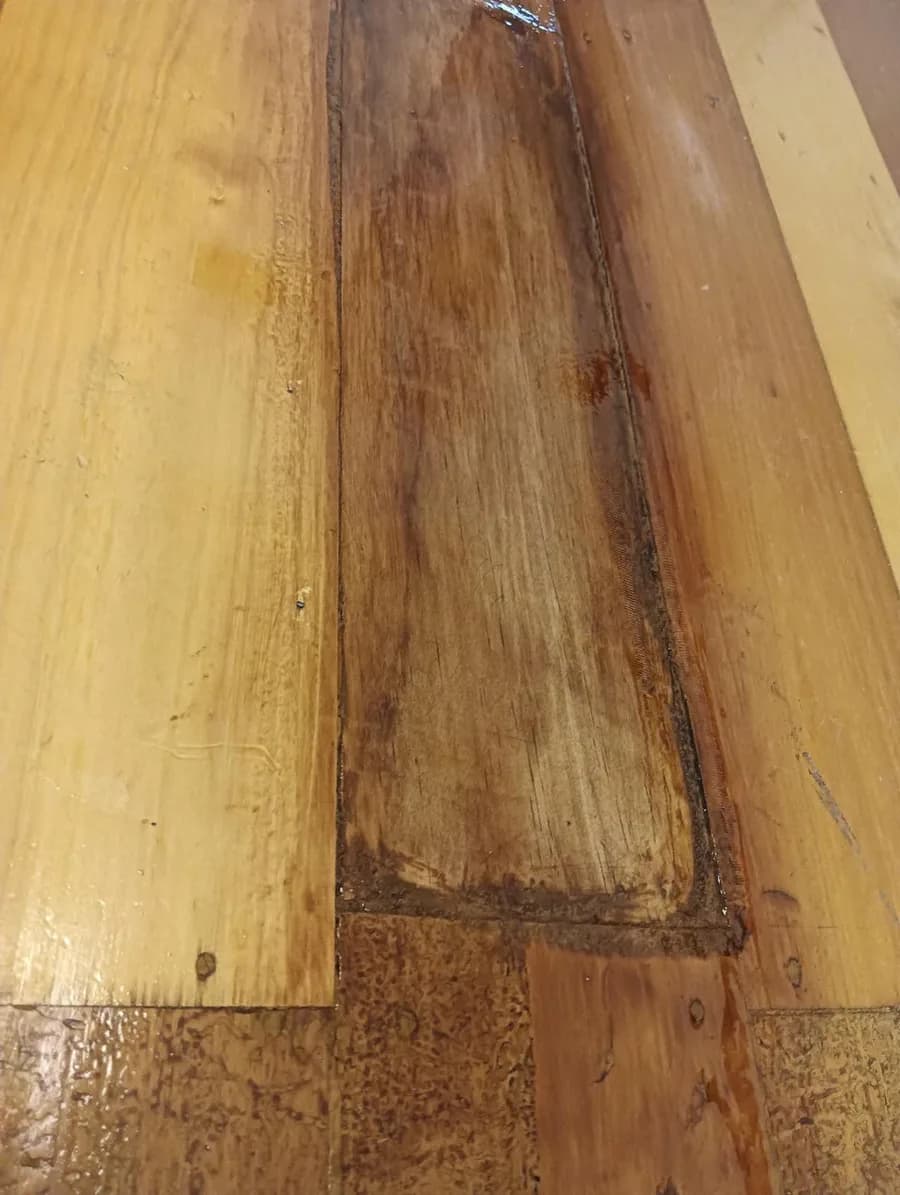
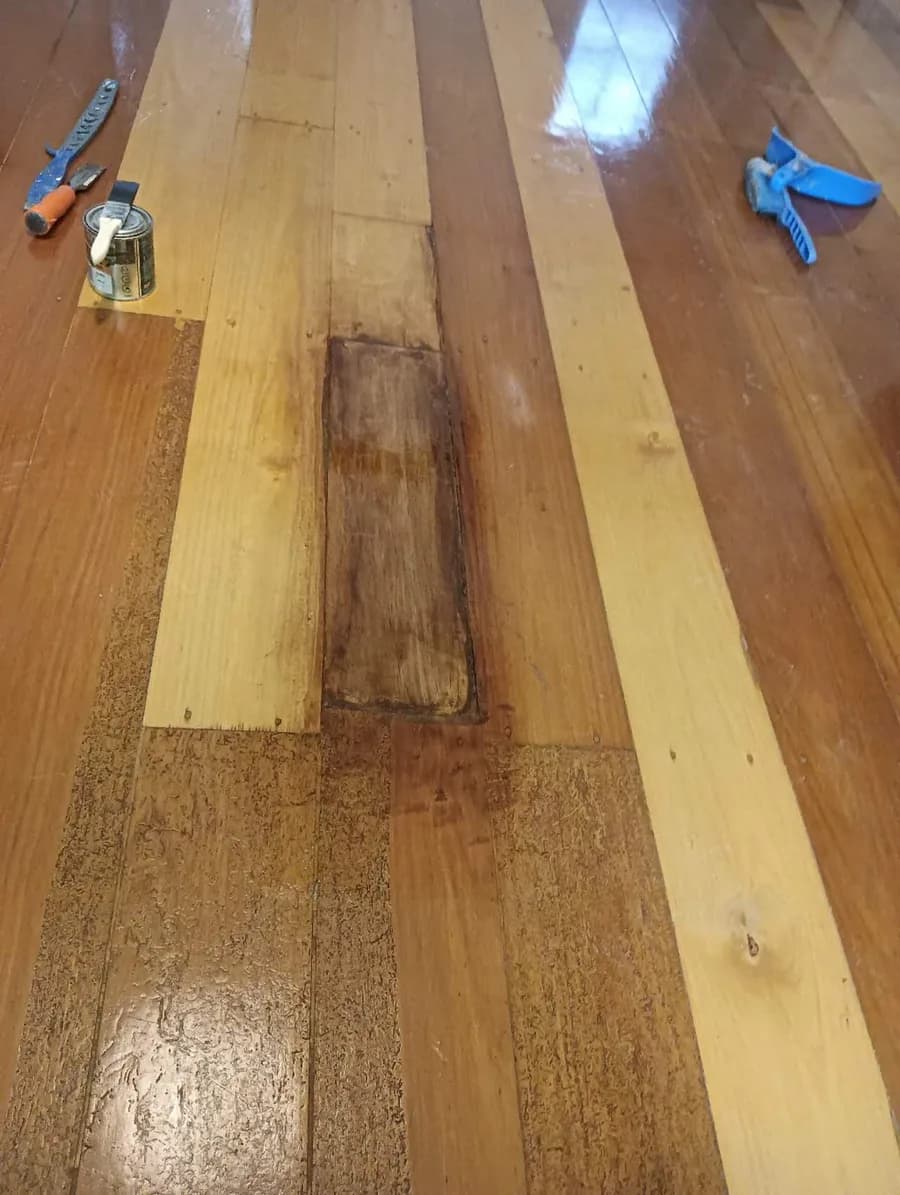
Local floorboard repair
Timber floorboard patch repair
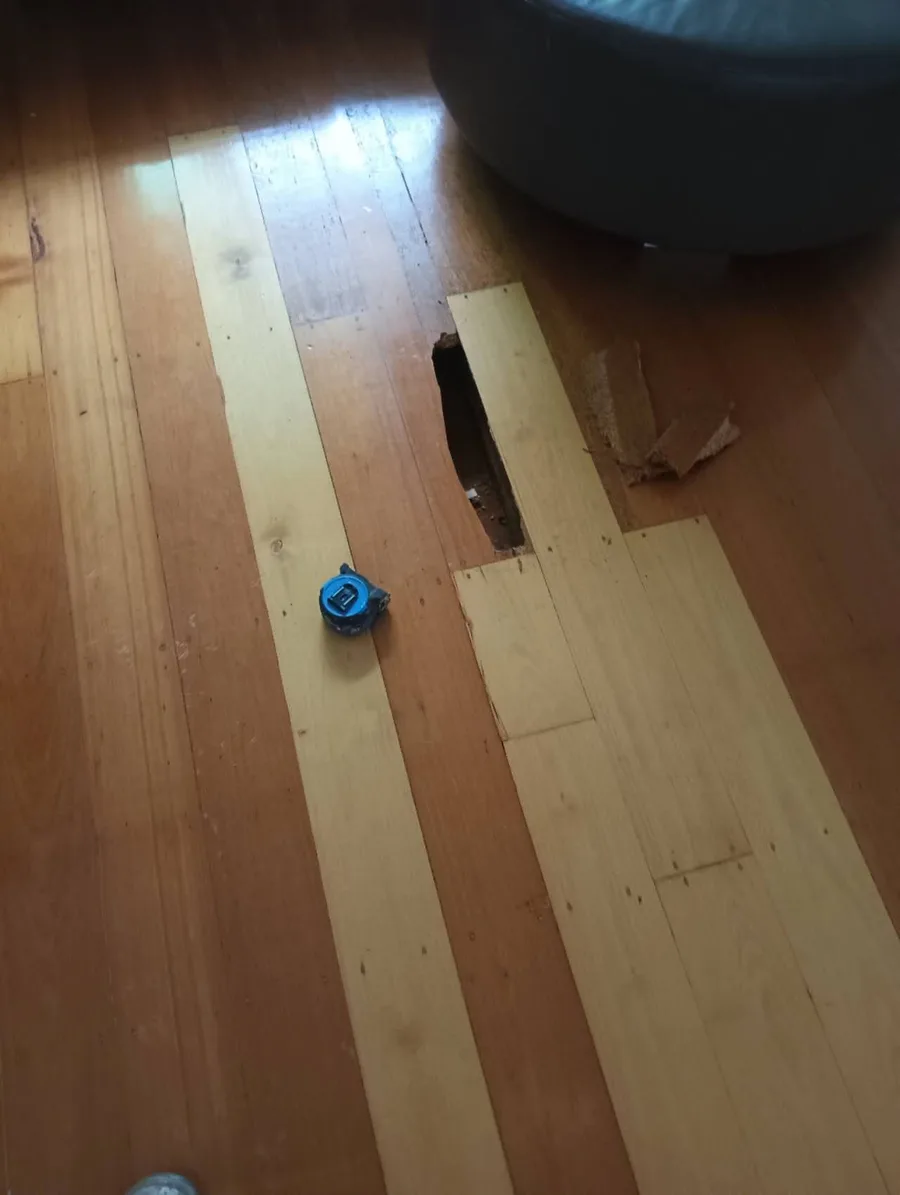
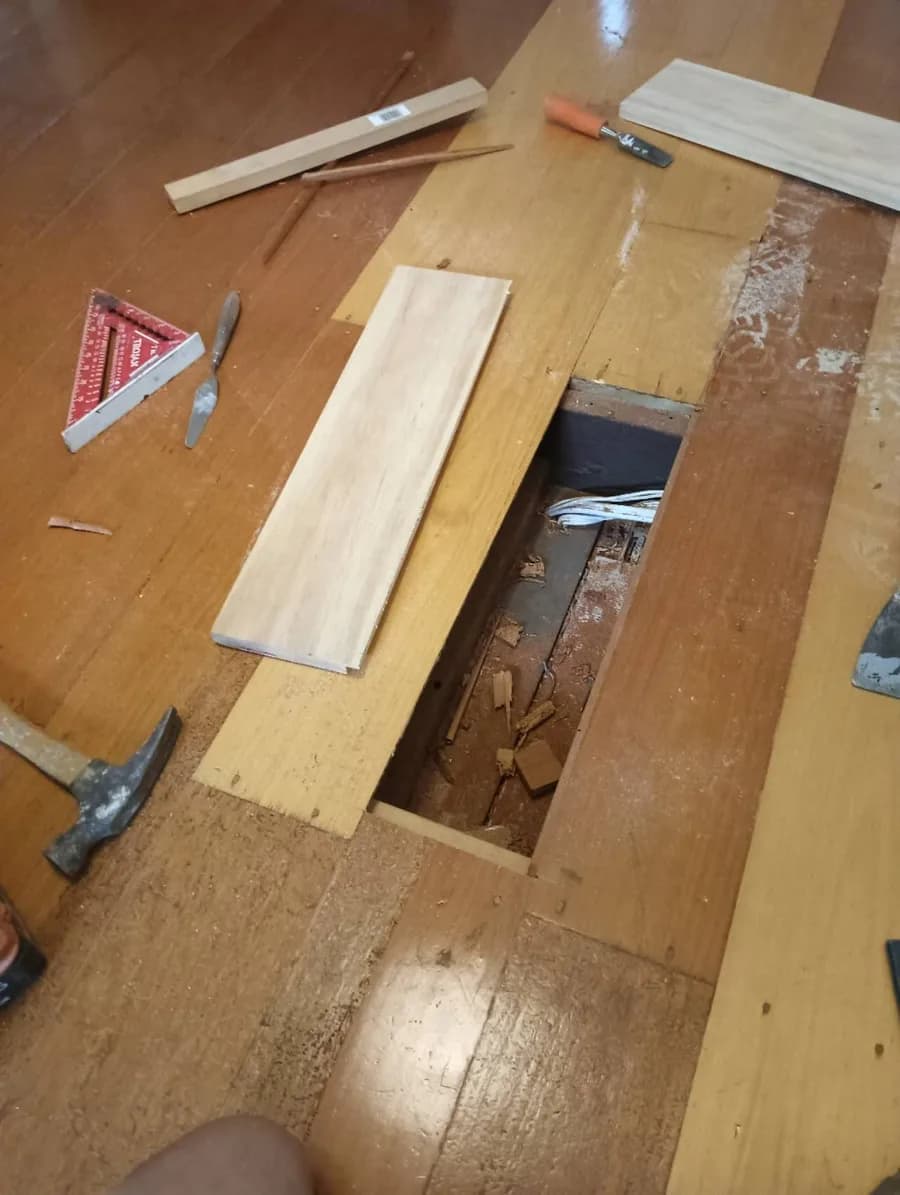
Five photographs follow a local floorboard repair from opened sections and a prepared inset through to close and wider views of the treated patch. The retained boards and the difference in colour and grain remain visible.
In progress: an opened floorboard section with the surrounding boards retained.
Installation in progress
In progress: the open section and replacement timber prepared for the local repair.
Installation in progress
In progress: the inset area prepared before local finishing.
Finish detail
Finish detail: the treated patch and its joins within the retained floorboard.
Finish detail
Finish detail: the local patch with the surrounding timber flooring retained.
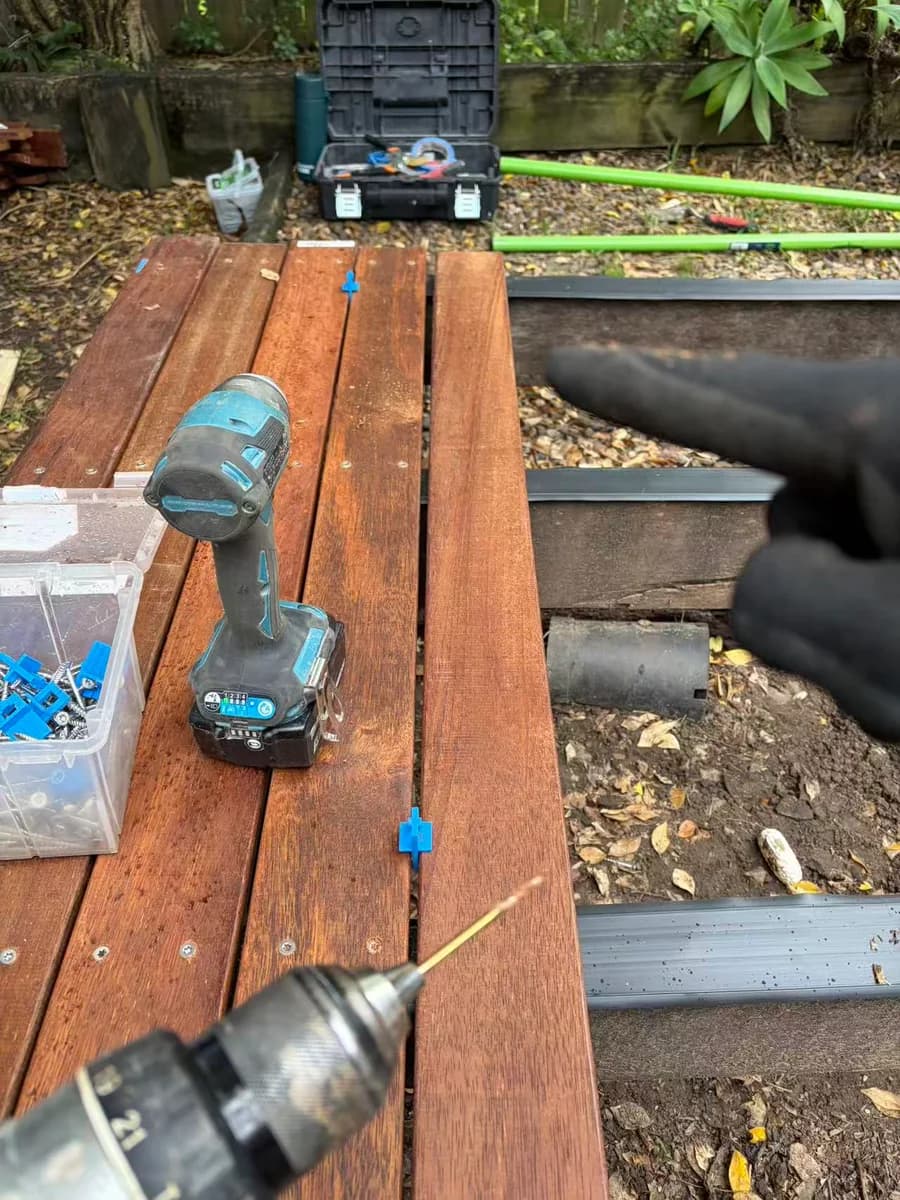
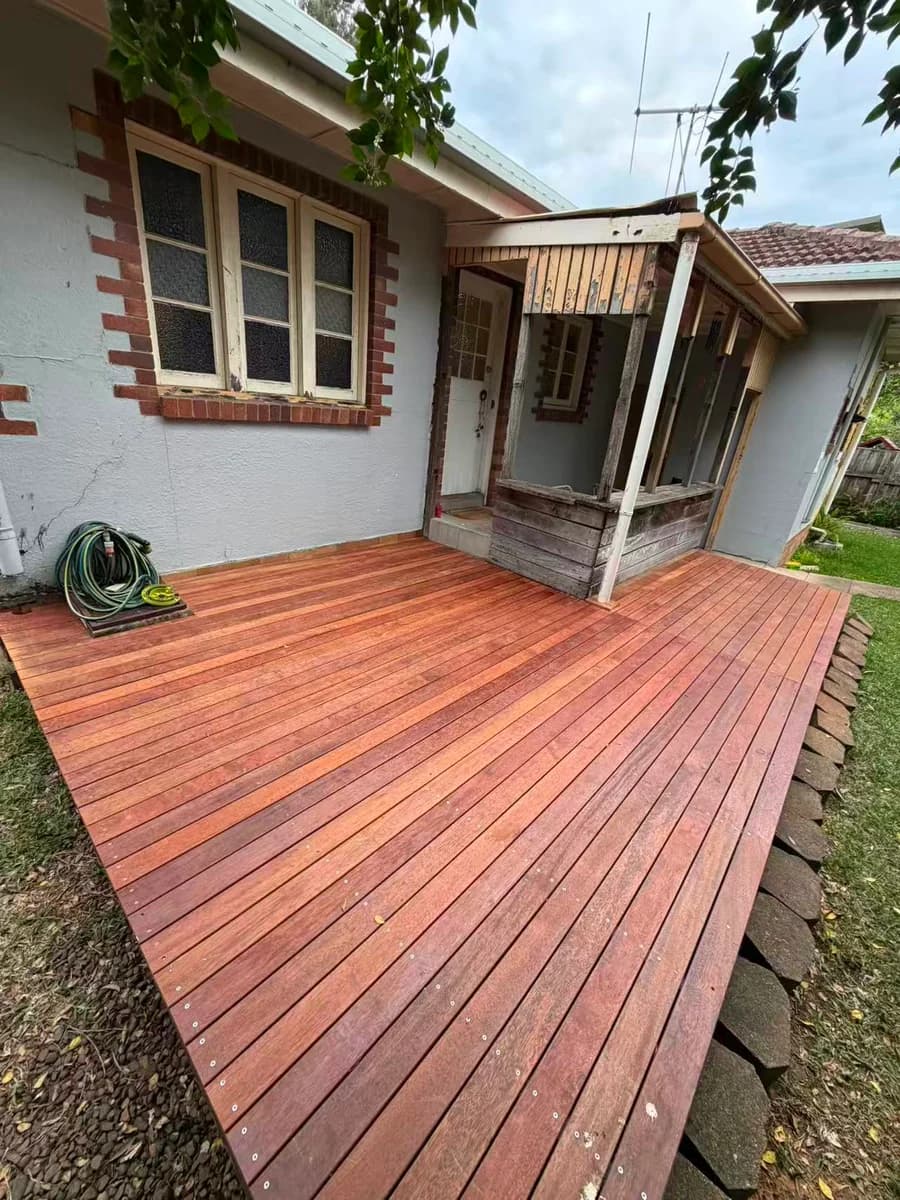
Outdoor deck boarding
Timber deck-board installation and fitted details
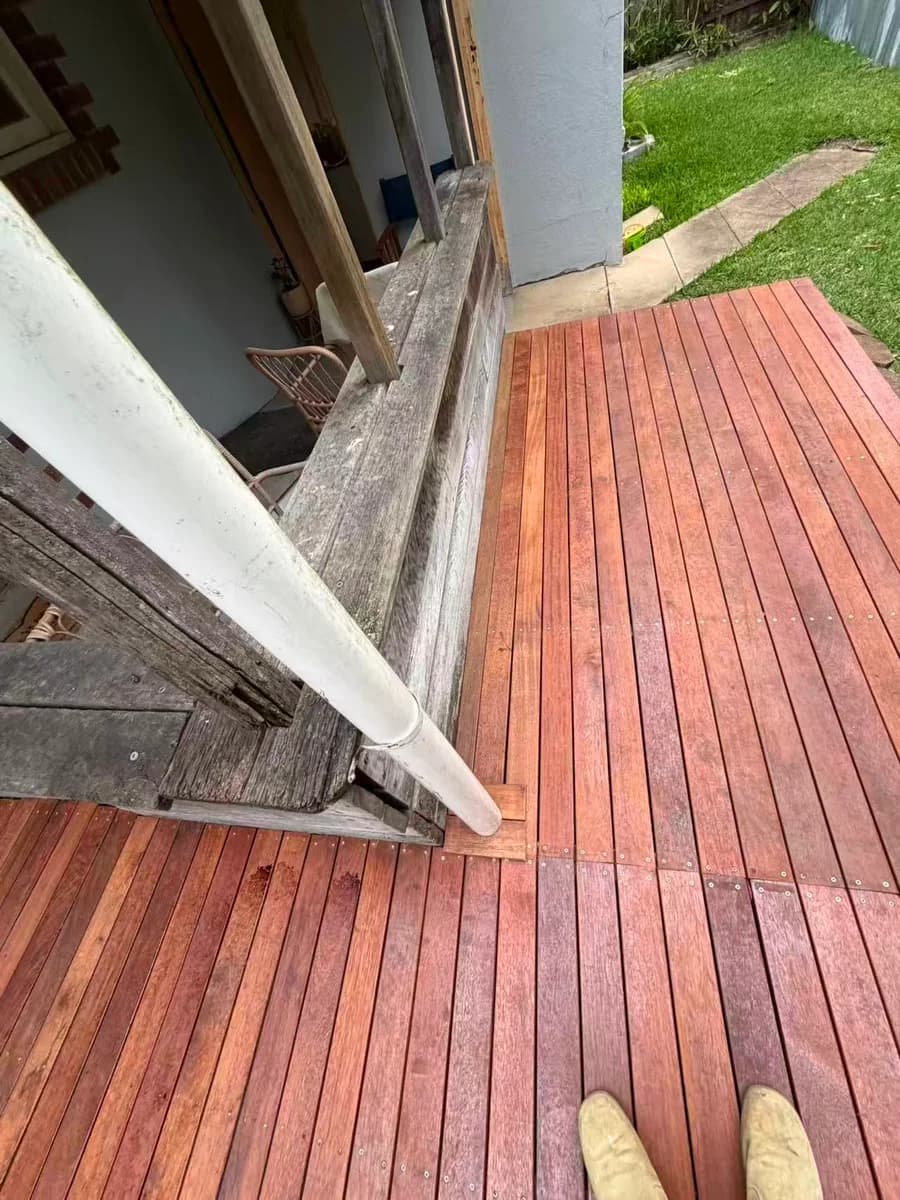
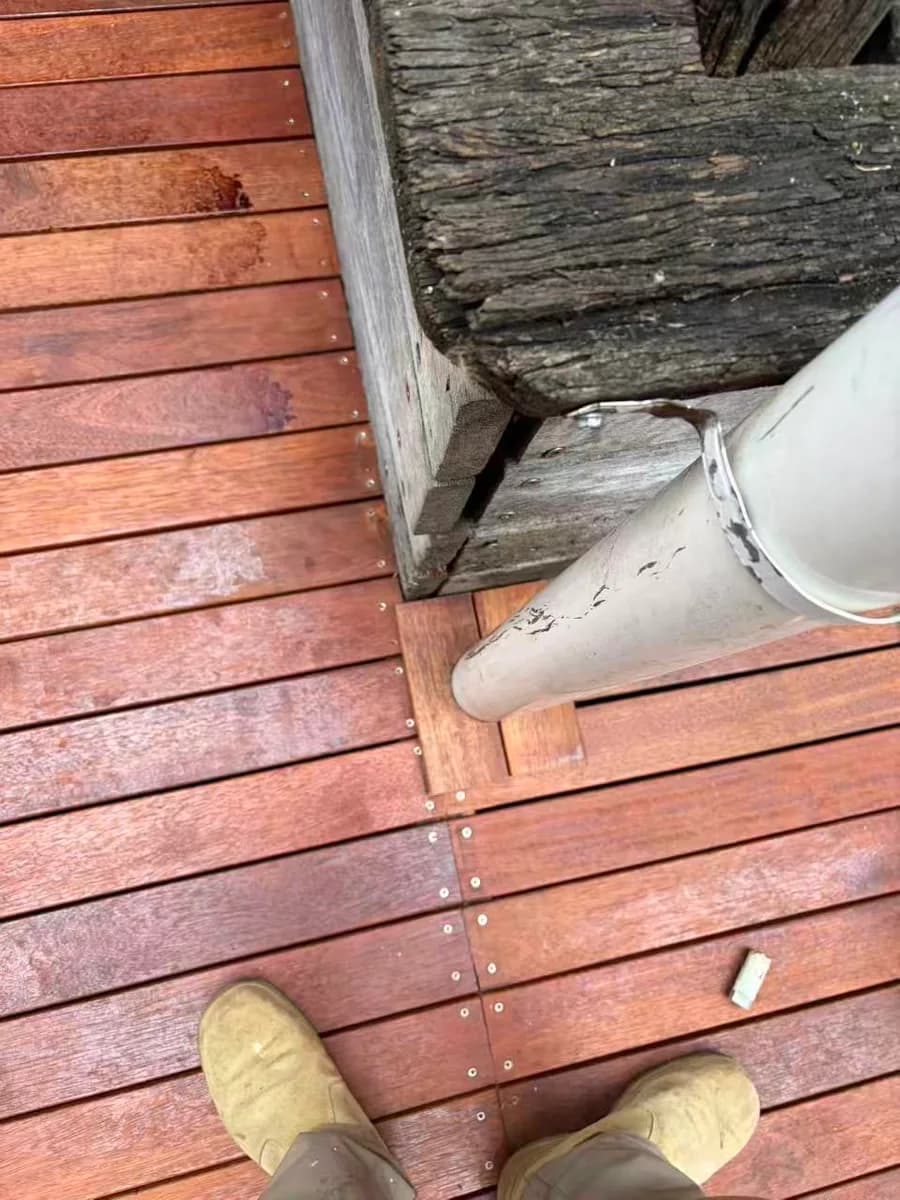
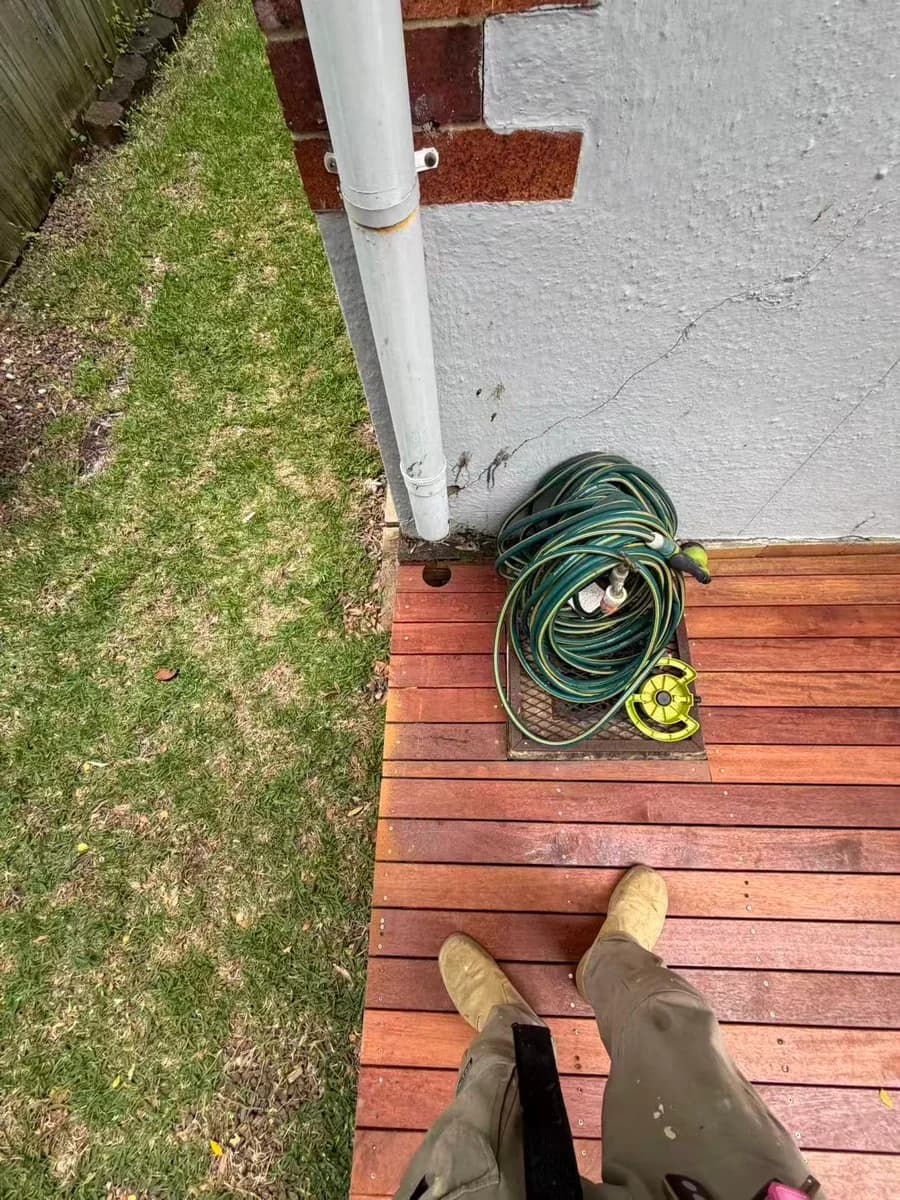
Five photographs show deck boards being laid and fixed, followed by the installed surface and fitted details around an existing porch, downpipe and wall-side hose area.
In progress: deck boards being fixed over the visible support frame, with blue spacing guides between boards.
Completed work
Installed view: the deck boards around the existing porch.
Finish detail
Fitted detail: board layout and edge trim beside the existing porch and downpipe.
Finish detail
Close detail: the deck-board trim around the downpipe.
Finish detail
Wall-side detail: fitted boards beside the hose stand and wall, with a small cutout visible.
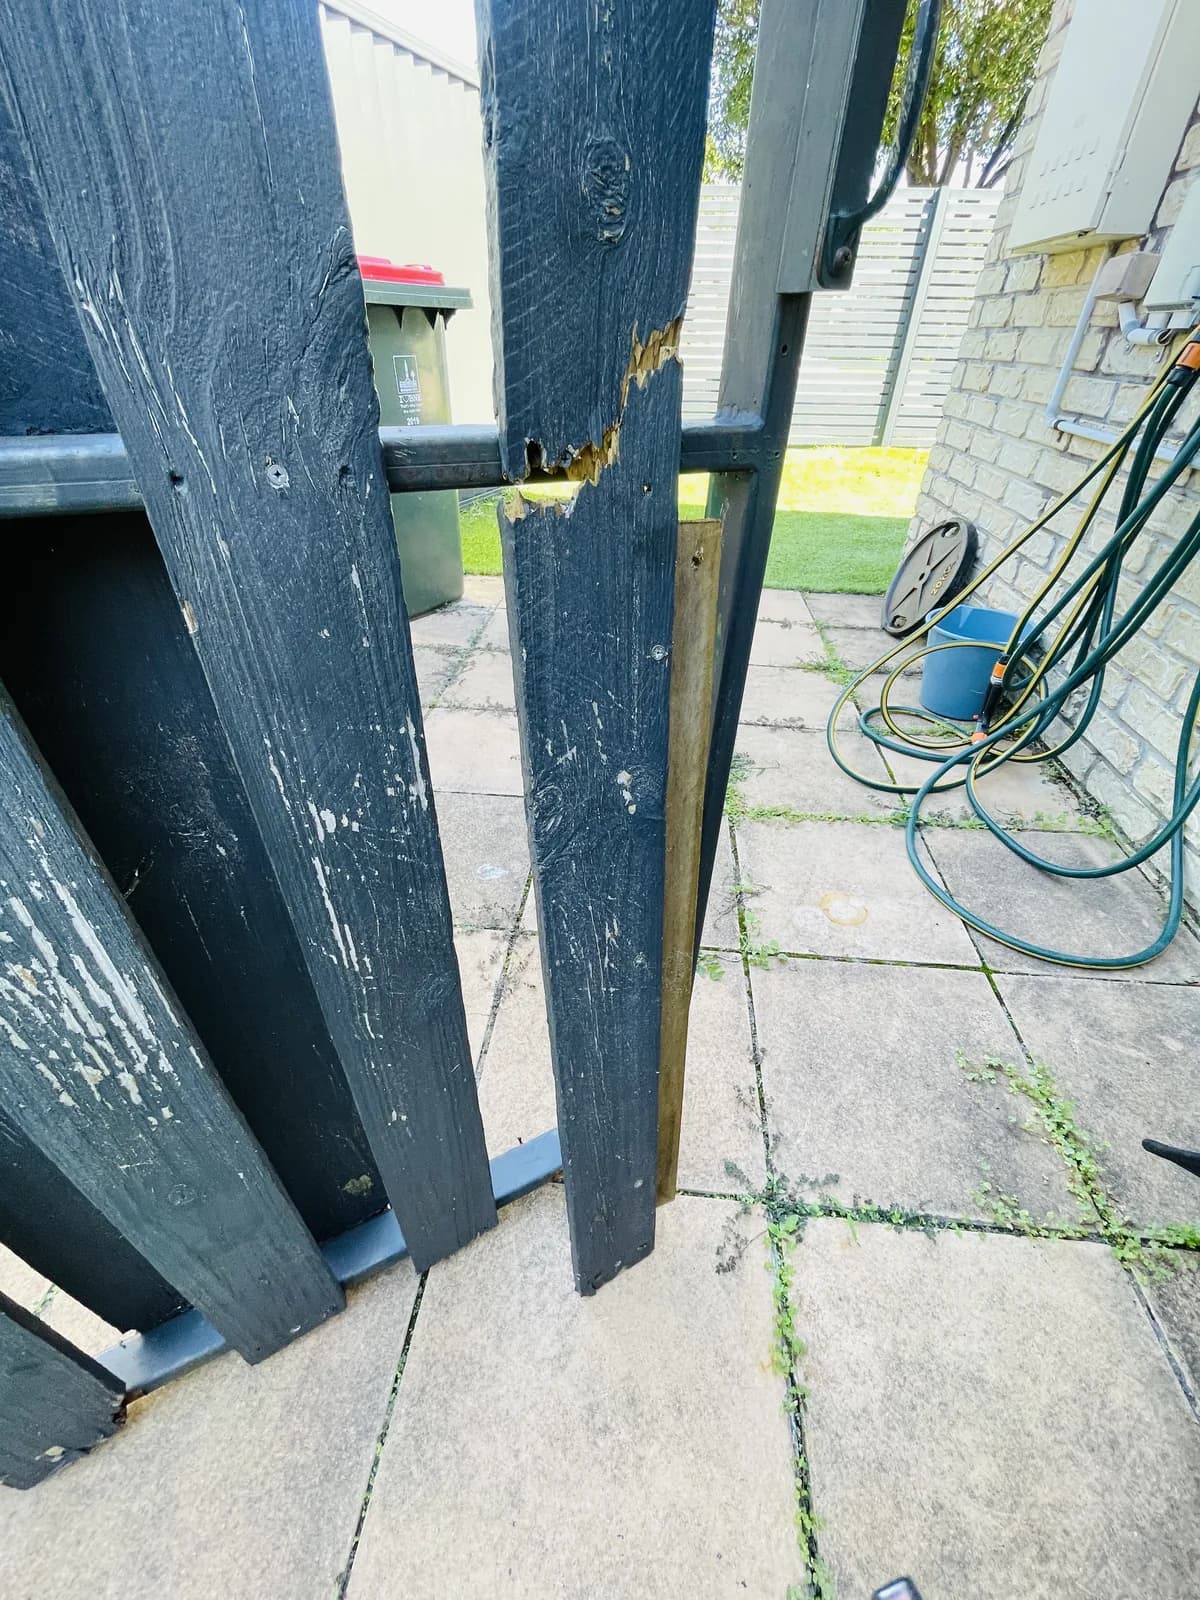
Timber gate comparison
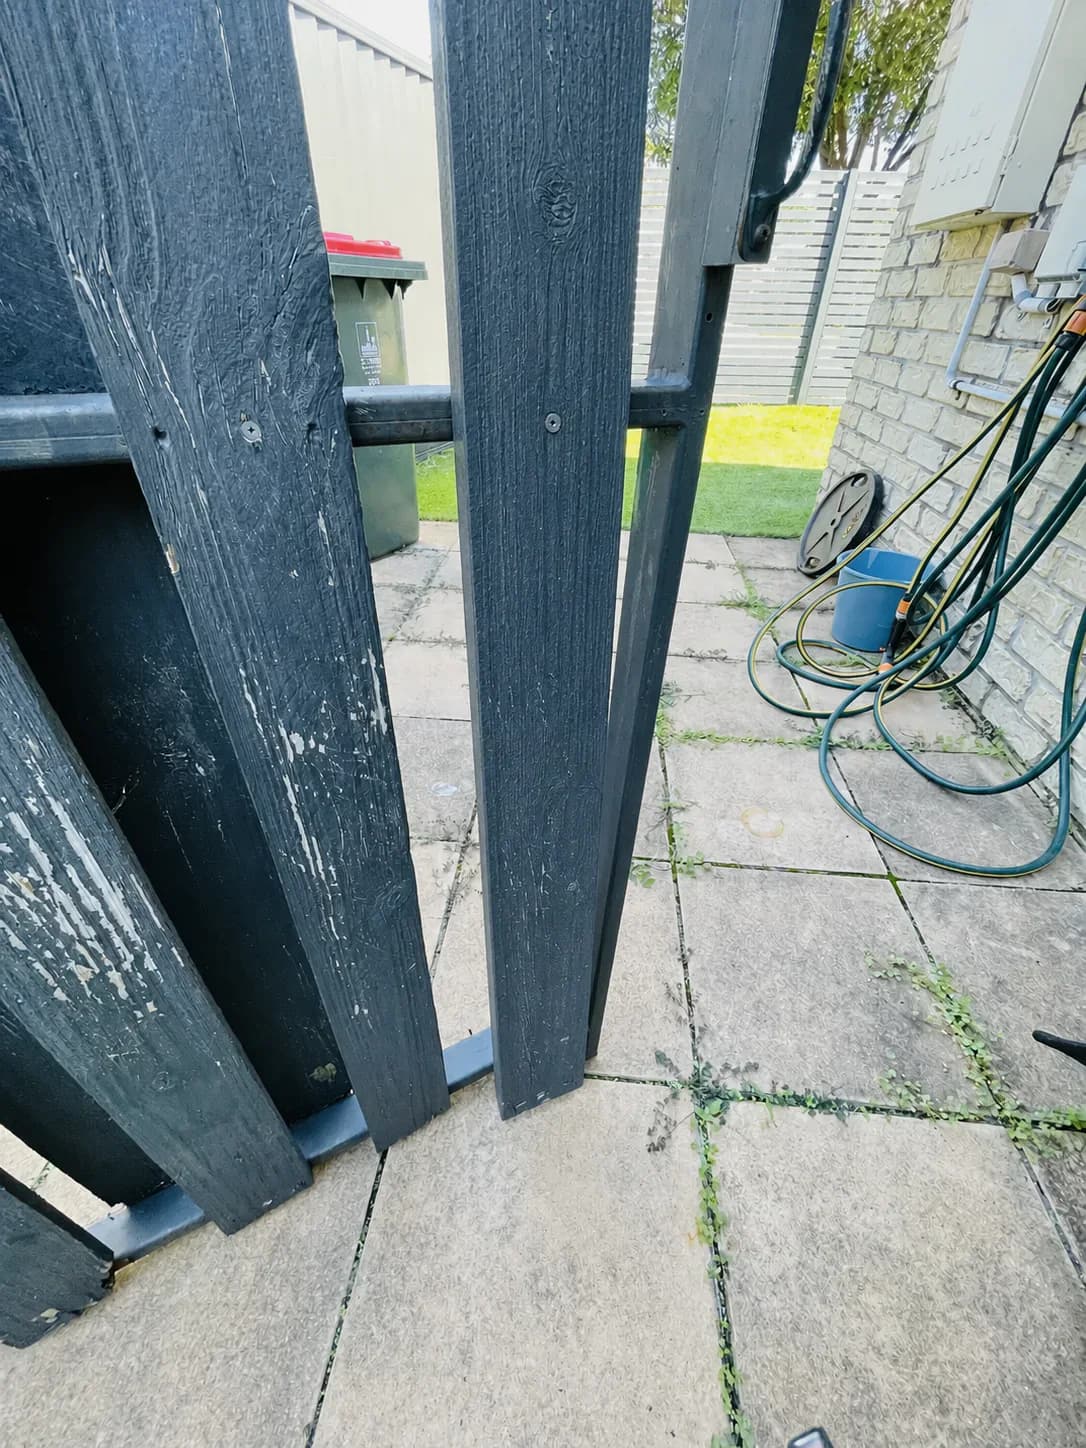
Broken gate paling and completed repair
The before views show split and missing timber in the central latch-side paling beside the gate frame. We replaced the damaged paling in this local timber-board repair. The completed photograph shows the renewed board and the gate area in its dark finish.
Before: split and missing timber around the latch-side gate paling.
After
After: the fractured central paling is replaced and the latch-side area is restored.
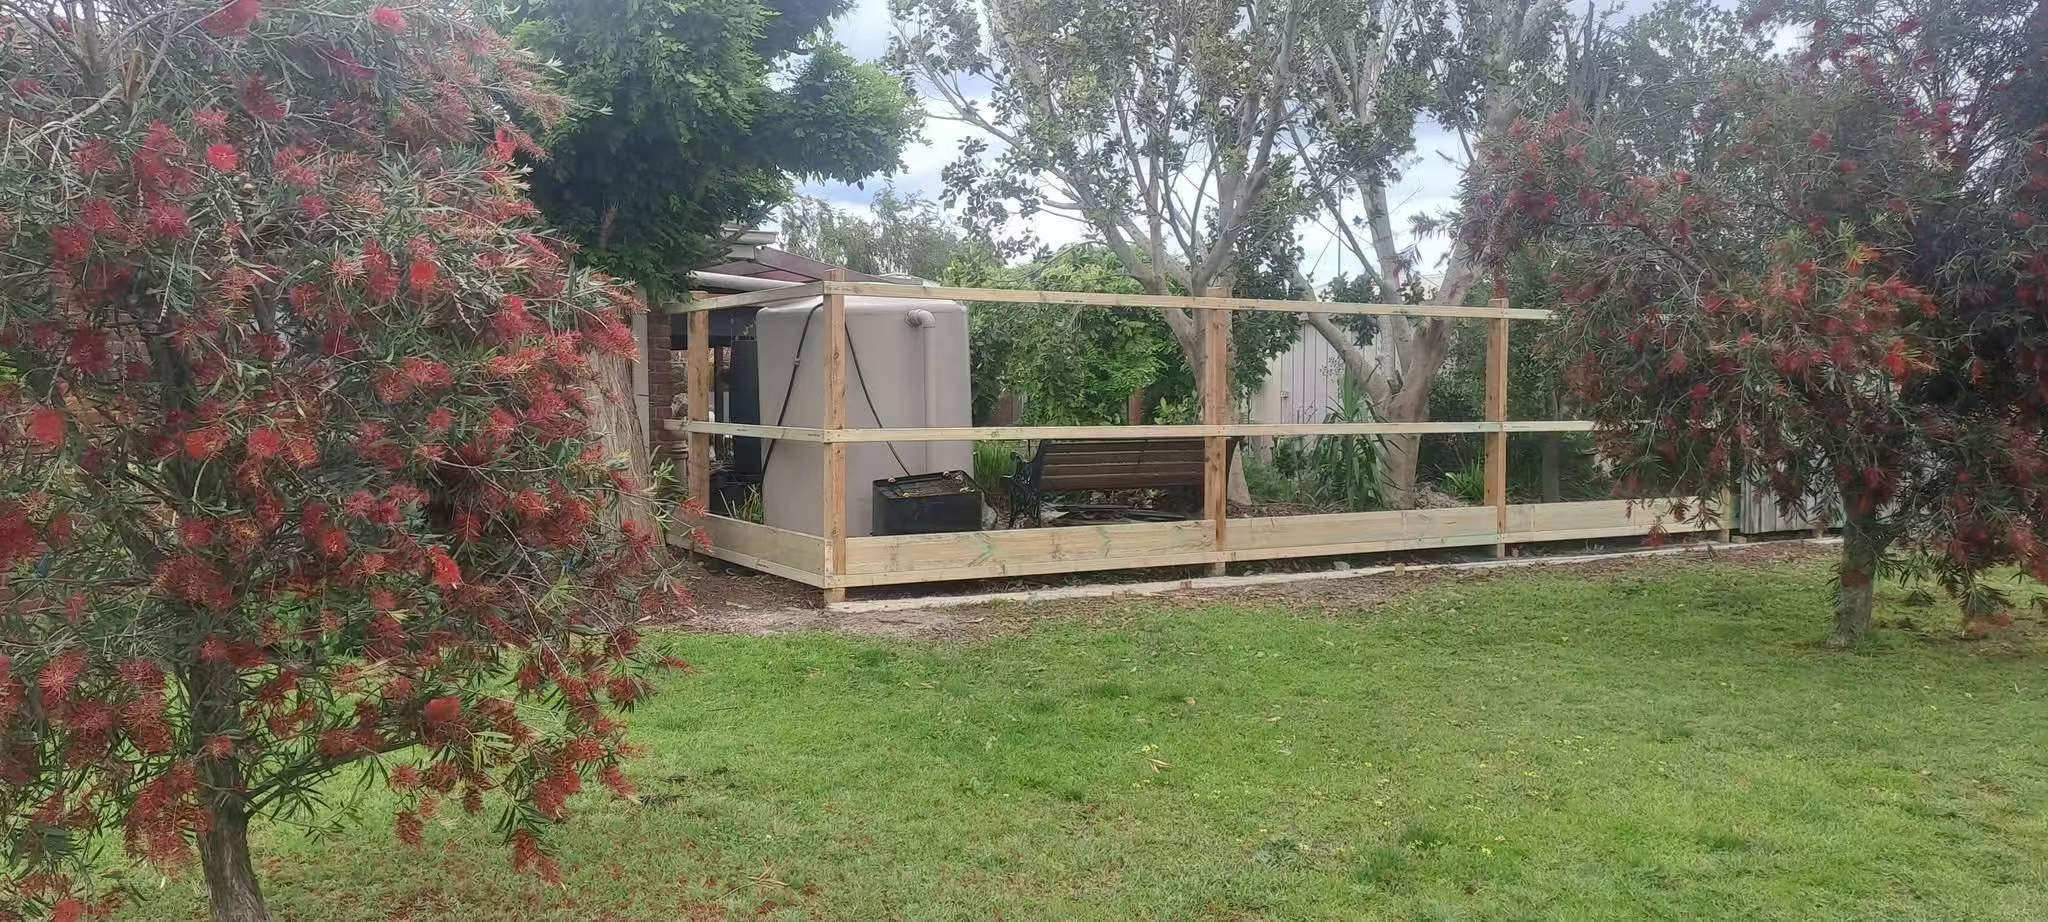
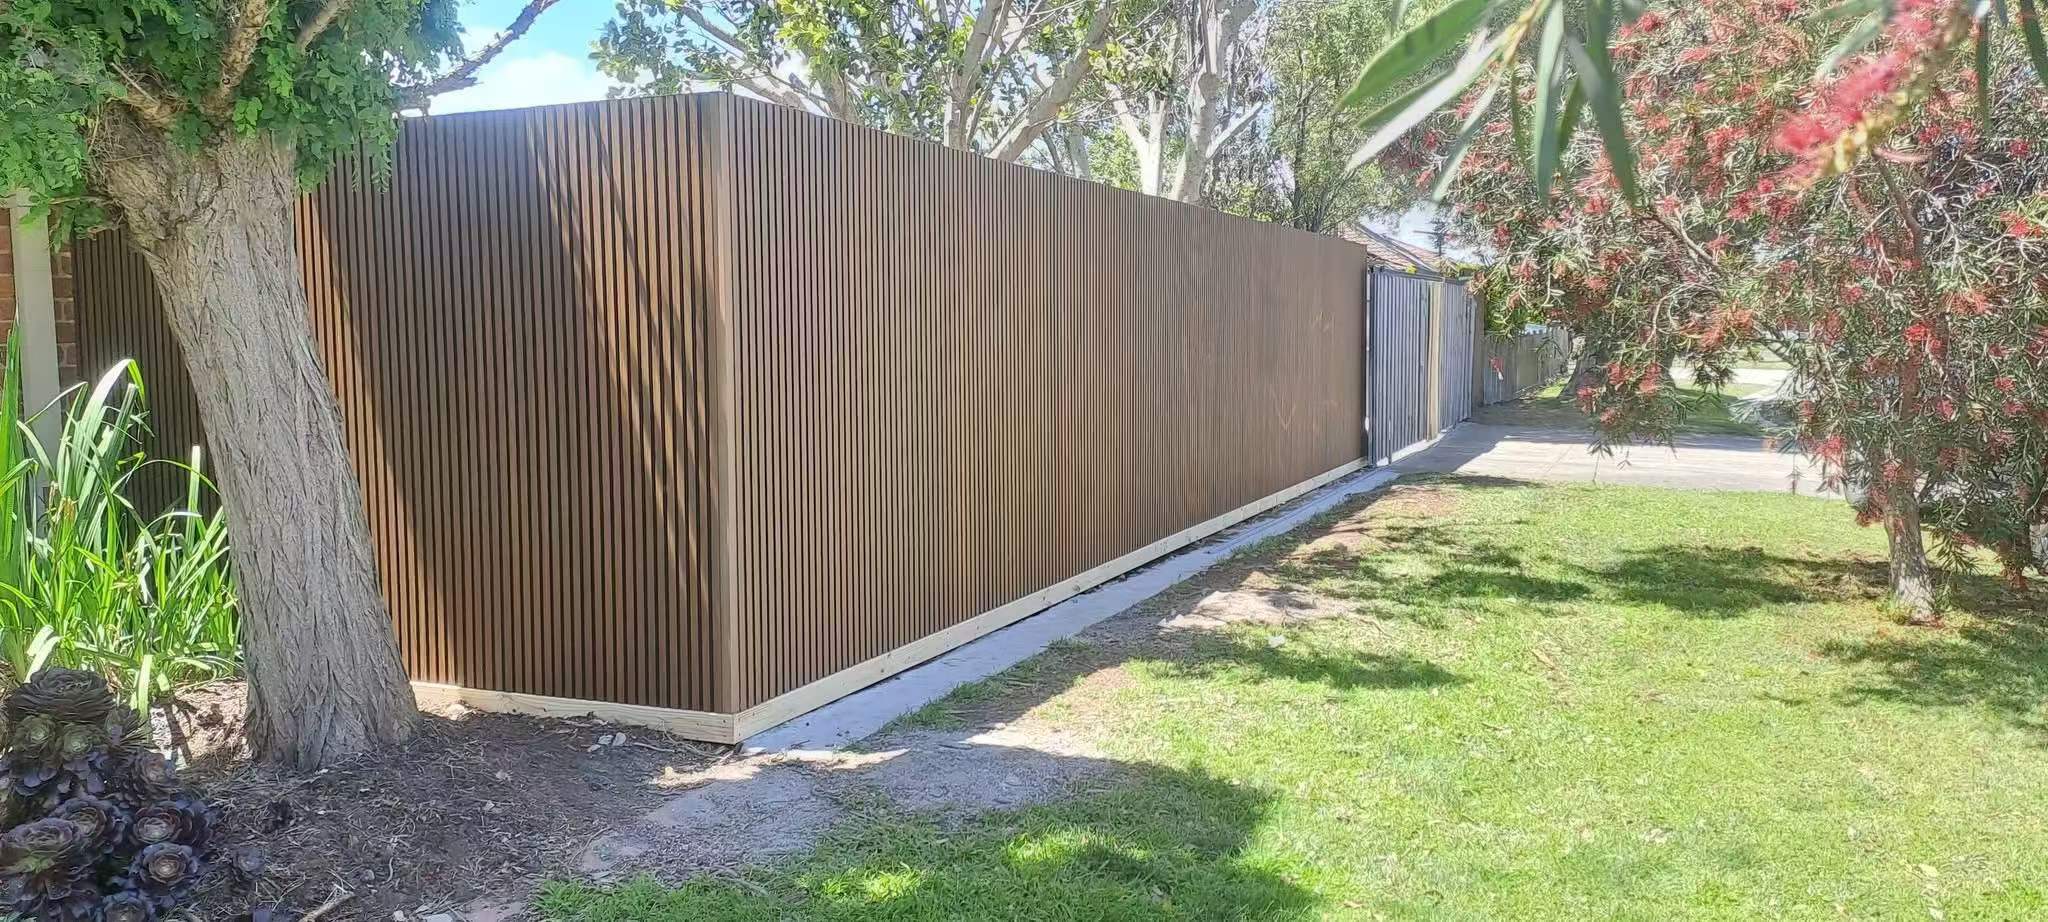
Fence replacement · progress and finish
Garden fence removed and replaced
We removed the old fence and rebuilt the run along the garden line. The installation view shows new timber posts and horizontal rails during construction; the finished view shows the dark vertical-profile fence beside the lawn.
New posts and rails taking shape along the garden fence line.
Completed work
Finished vertical profile forming a continuous edge beside the lawn.
Outdoor timber comparison
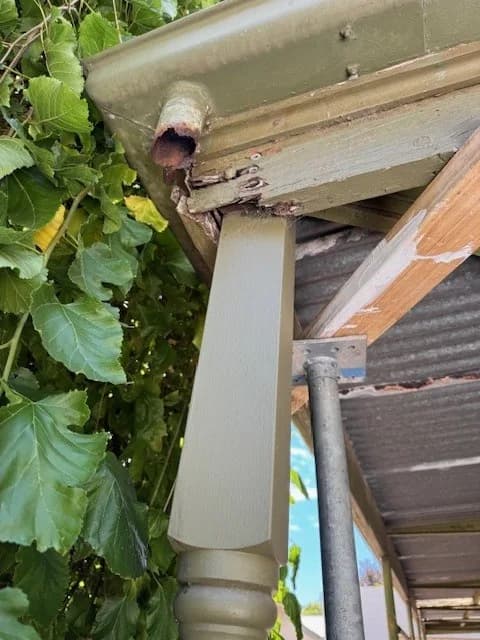
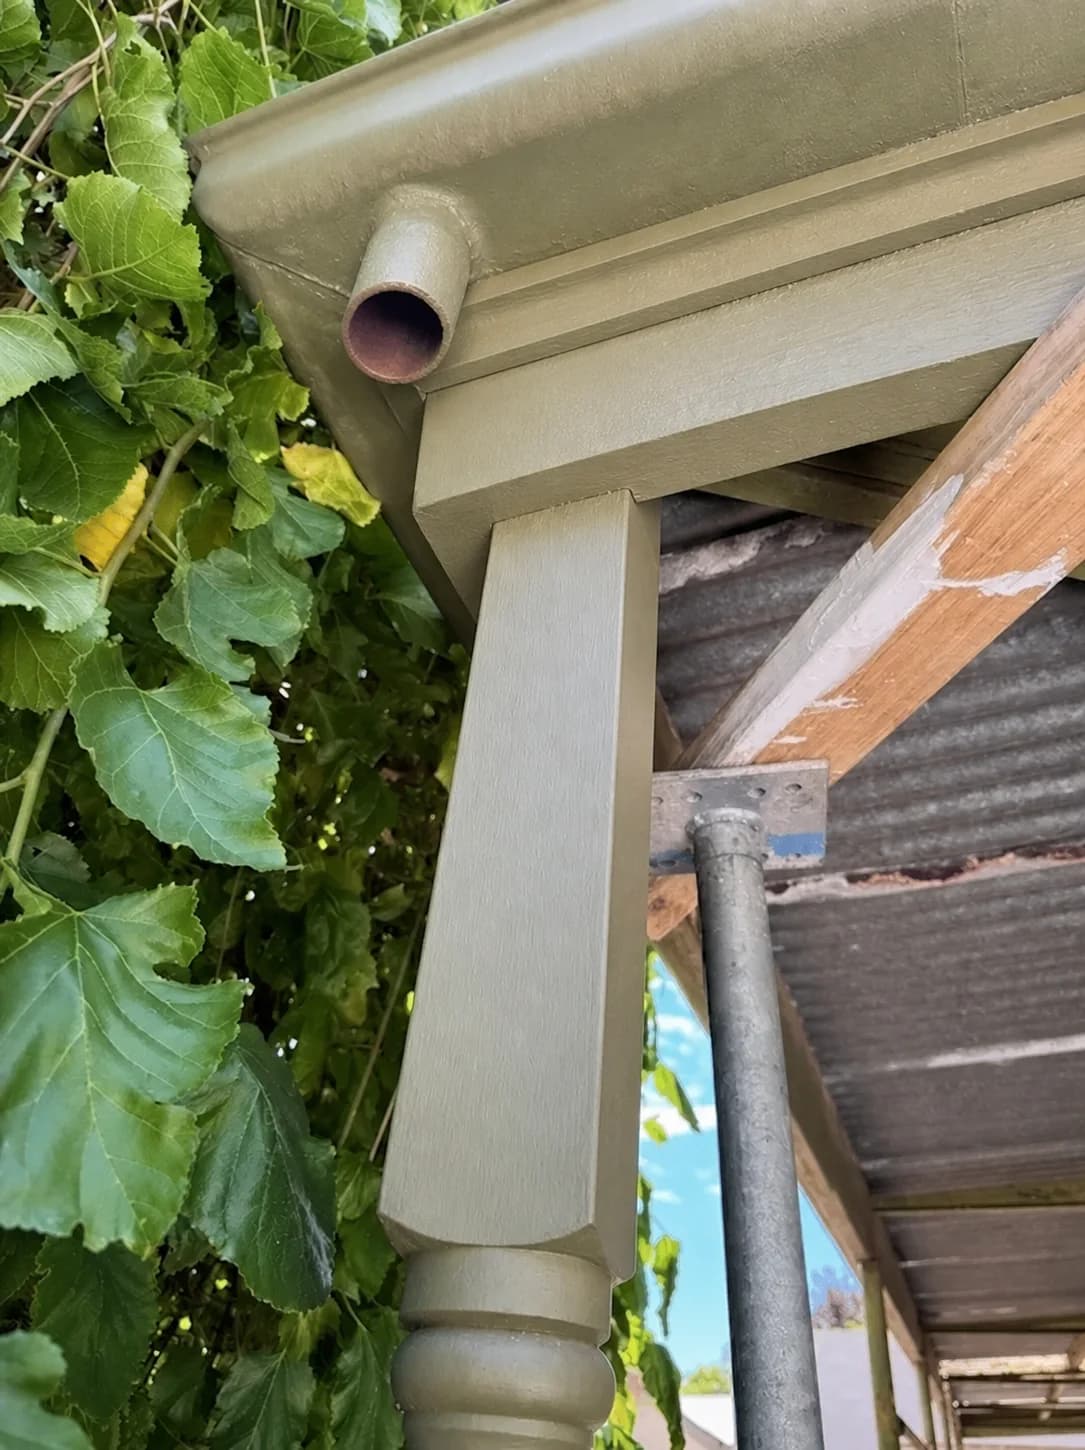
Deteriorated roof corner and completed repair
The before views show deteriorated painted timber at the outer corner of the roofed structure. A progress photograph shows temporary support during preparation. The completed view shows renewed corner timber and a matching painted surface.
Before: visible timber deterioration at the outer corner.
After
After: renewed roof-corner timber with a matching painted finish.
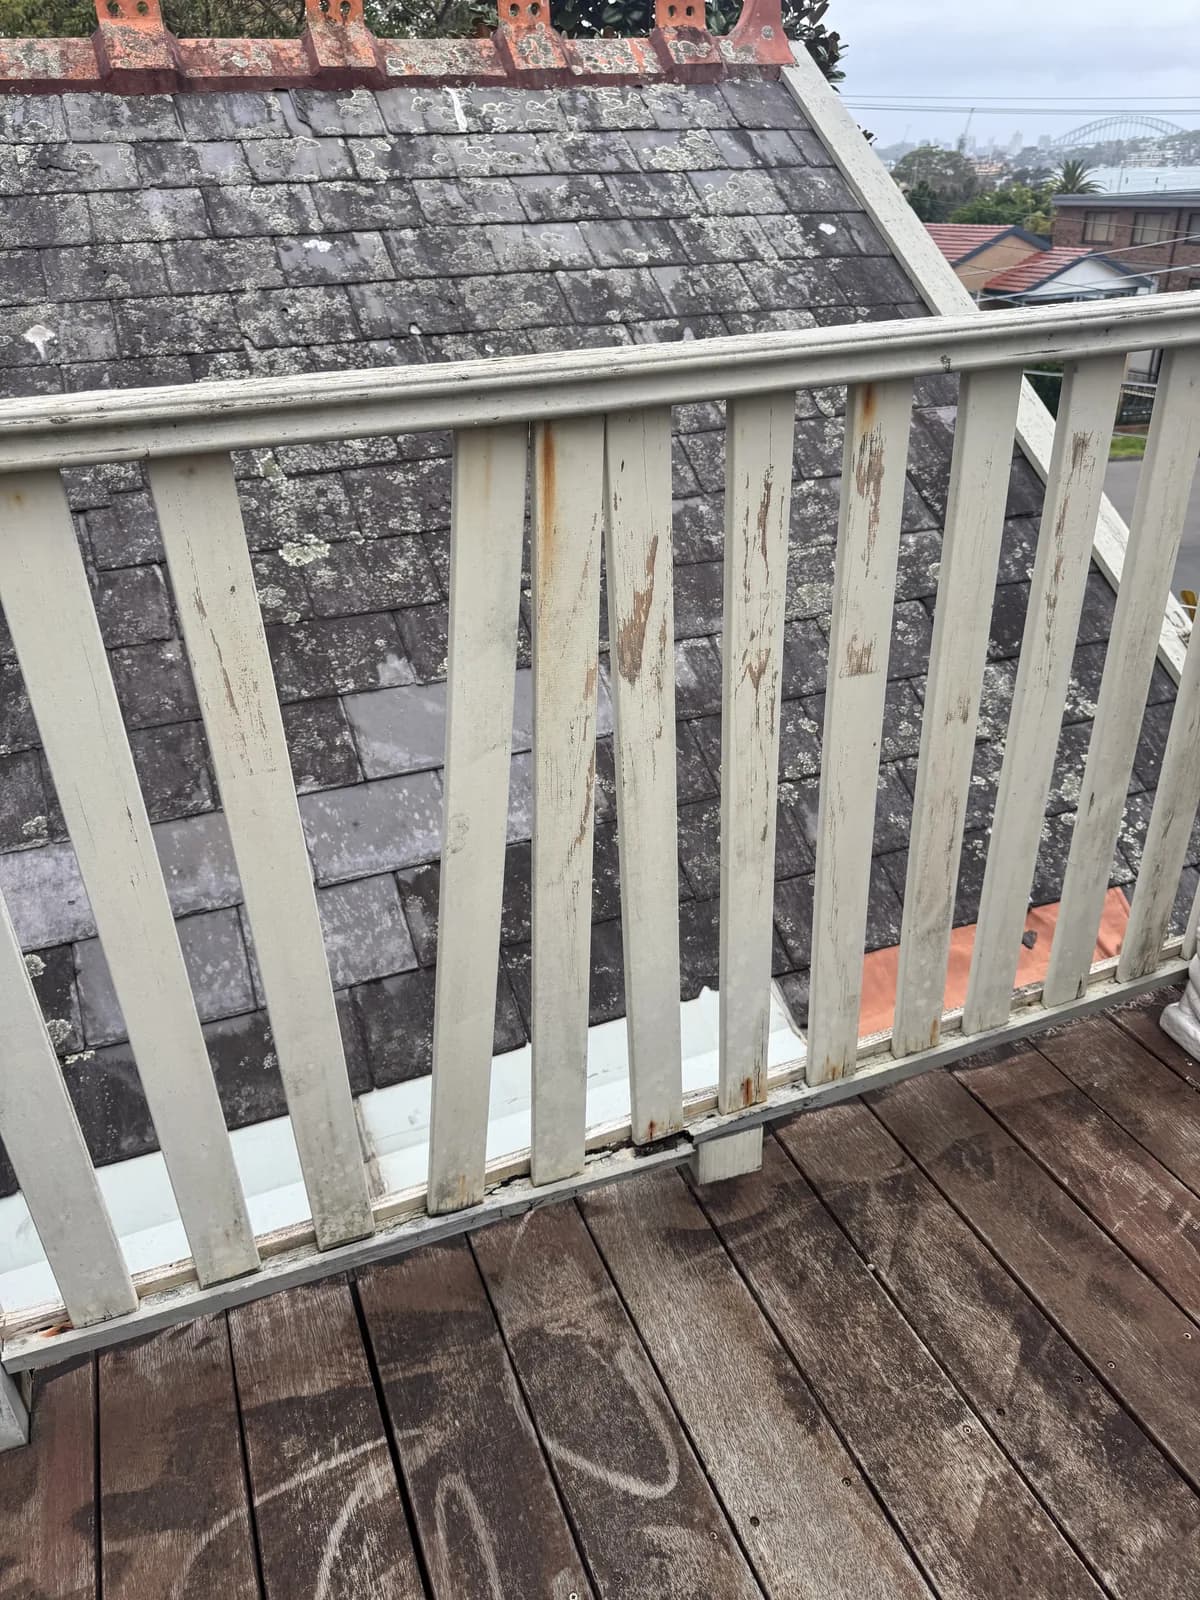
Balustrade comparison
Weathered balustrade and completed repair
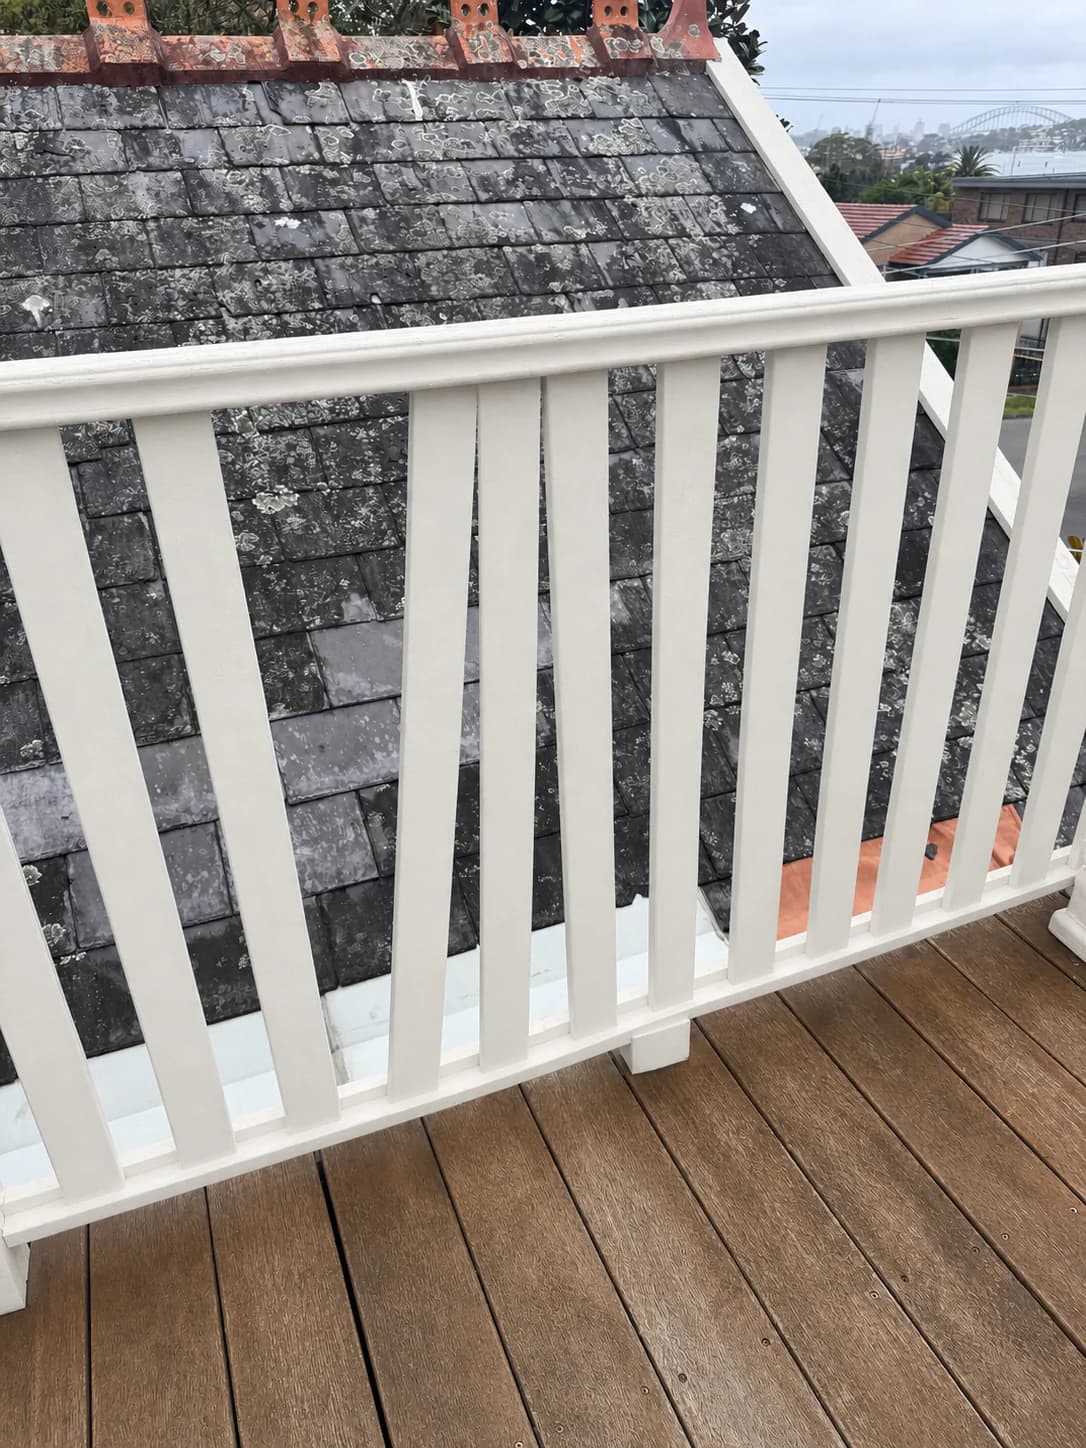
The before view shows weathered coating and staining near the lower rail of the external timber balustrade. The completed view shows repaired timber and a more even renewed finish across the same detail.
Before: weathered coating, staining and wear across the timber balustrade.
After
After: repaired timber with an even renewed finish.
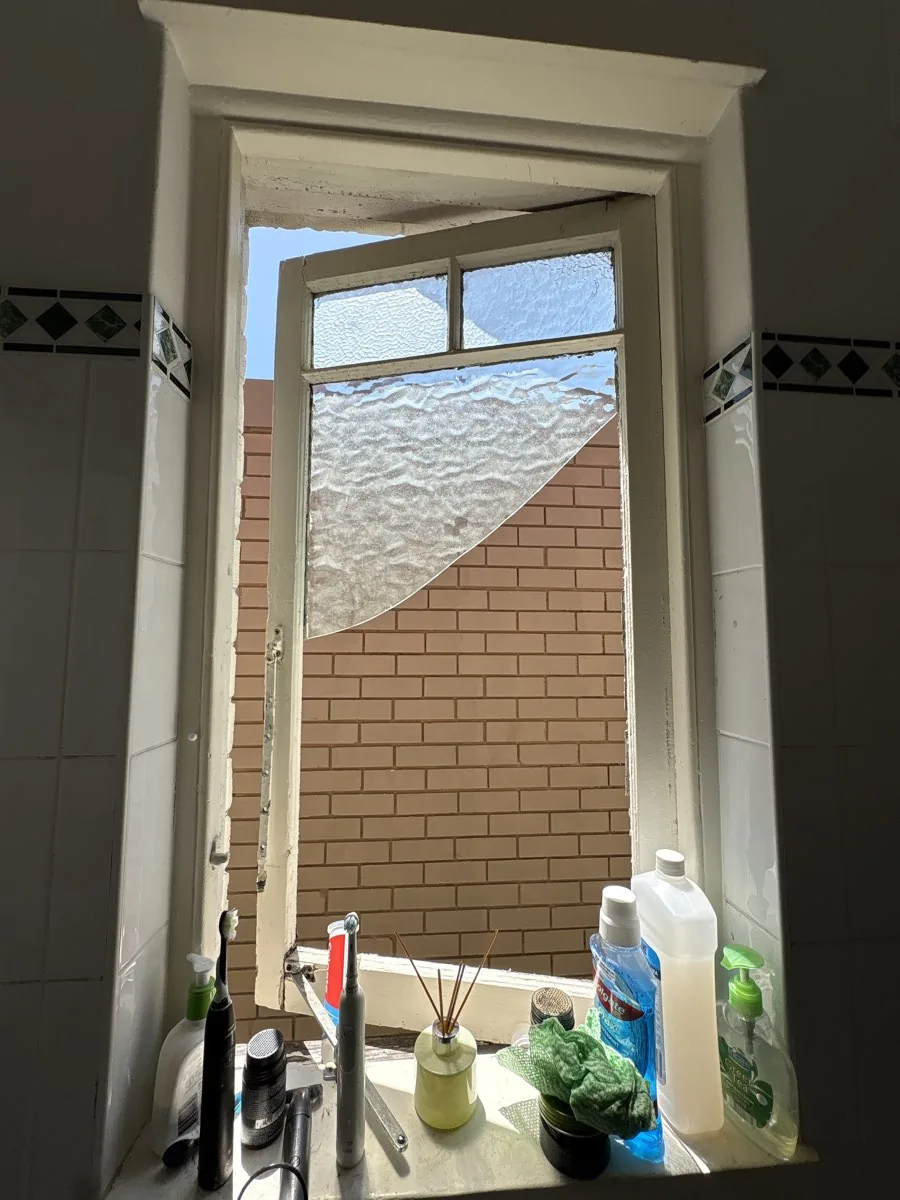
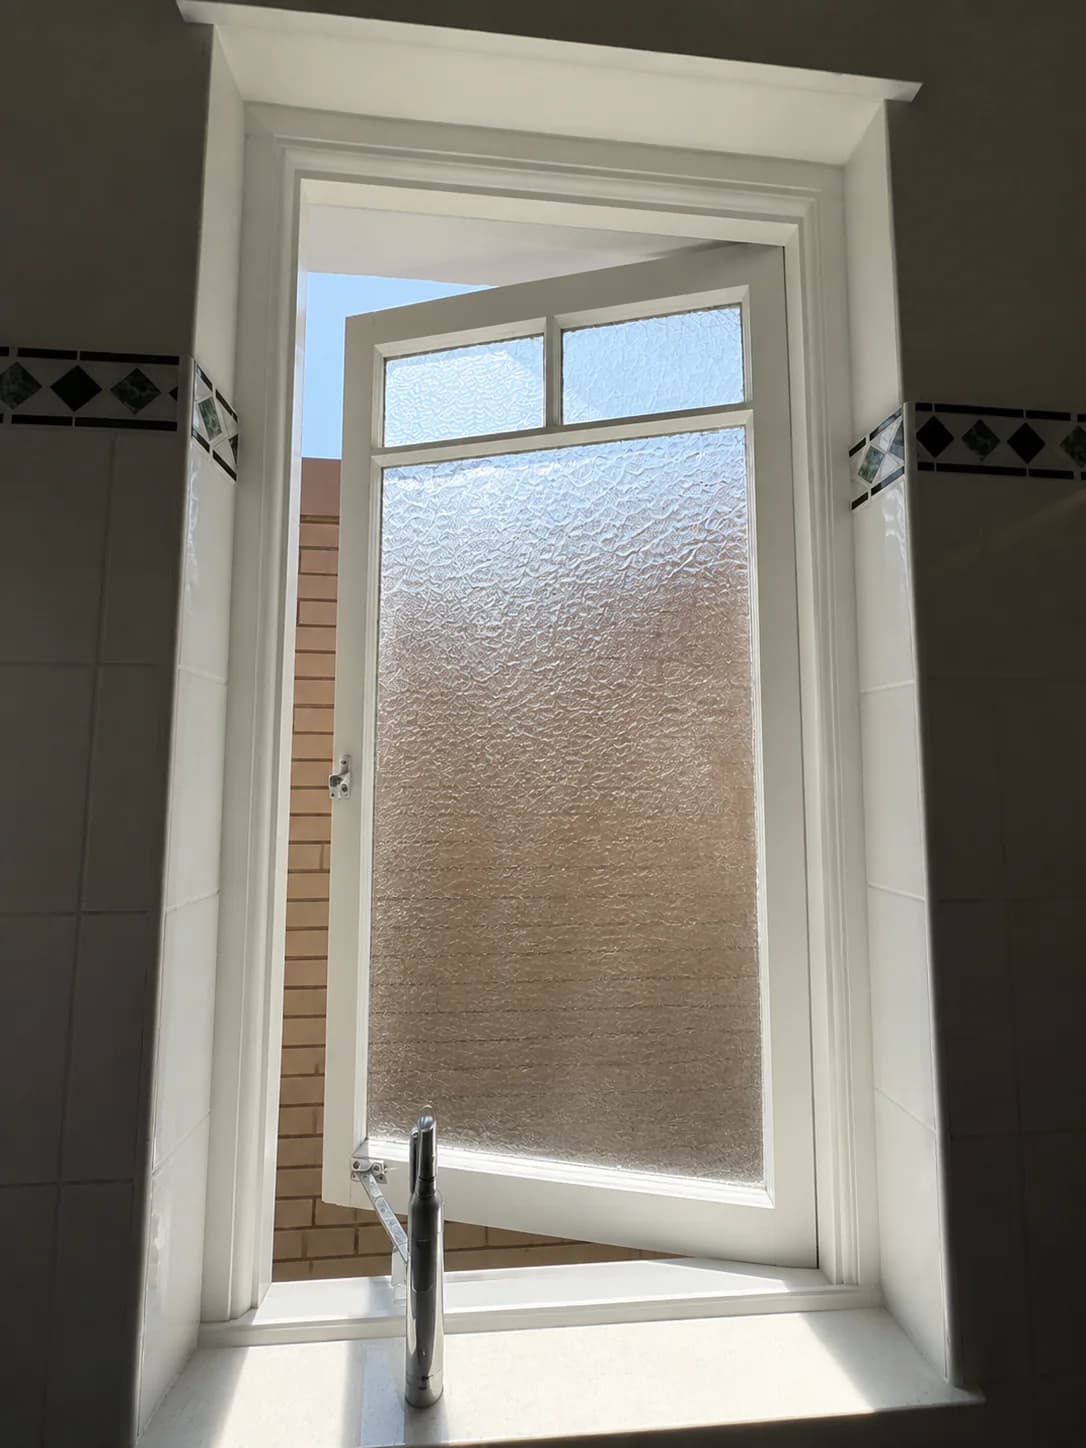
Timber window comparison
Damaged awning window and completed repair
The before view shows the timber awning sash, frame, operating hardware and damaged patterned pane. The completed view shows the restored timber components, hardware and privacy glass at the same opening. The project included distinct carpentry and glazing work.
Before: damaged awning window, timber sash and existing hardware.
After
After: restored sash, frame, hardware and privacy glass.
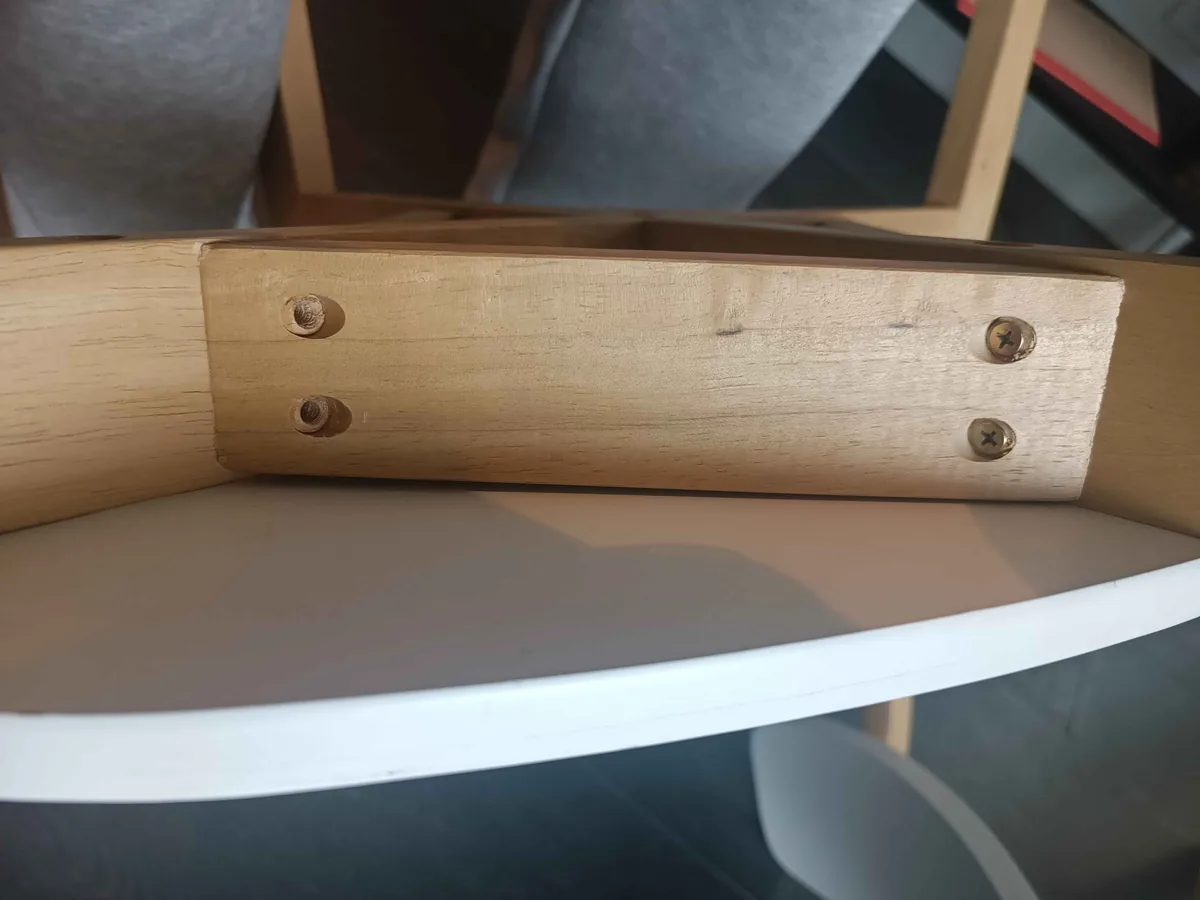
Shelving fixing detail
Curved timber shelf support and fixing points
The underside view shows a curved timber shelf, its fitted support block and visible screw locations. For a similar installation, tell us what you want to store and we will check the timber, fixing surface and suitable support before quoting.
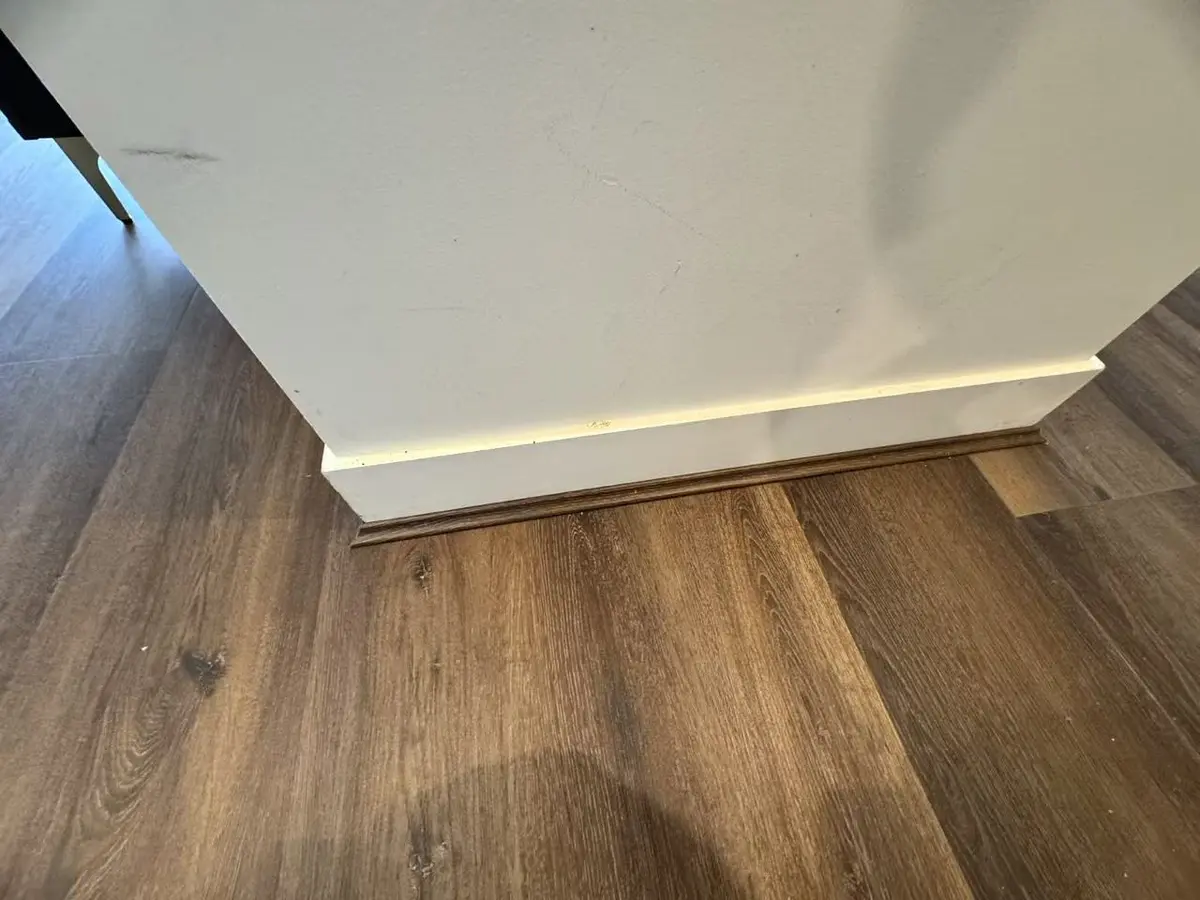
The close view shows dark plank flooring meeting white skirting and an edge trim at an opening, including the transition to the retained adjoining finish.
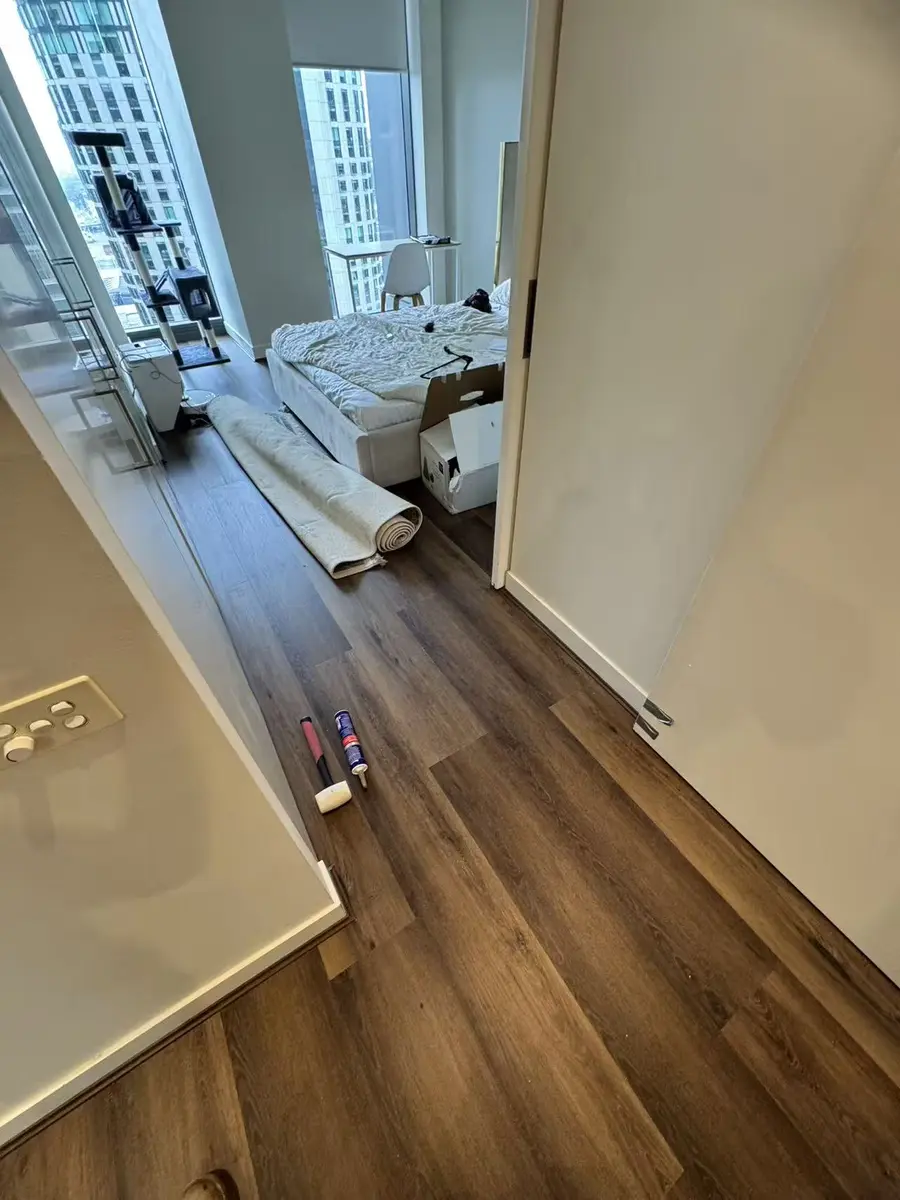
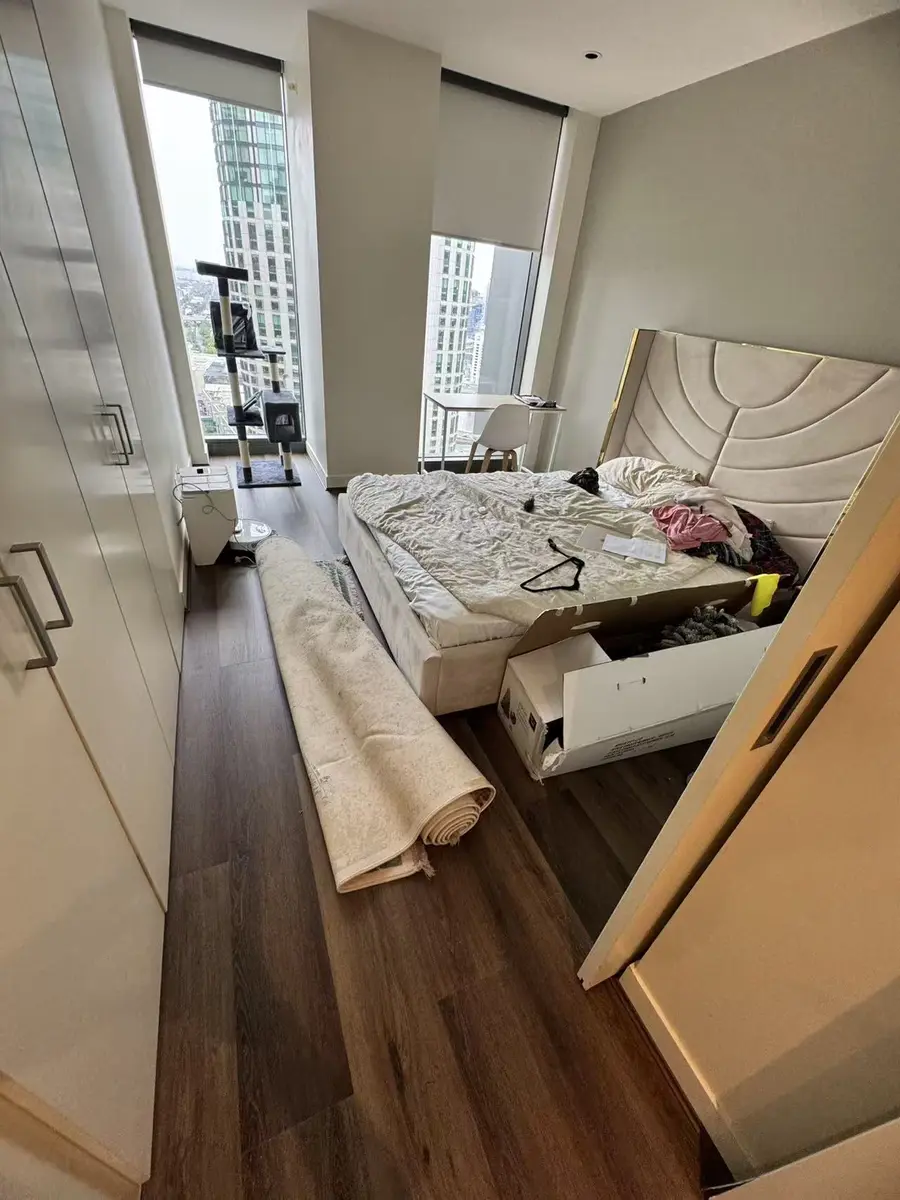
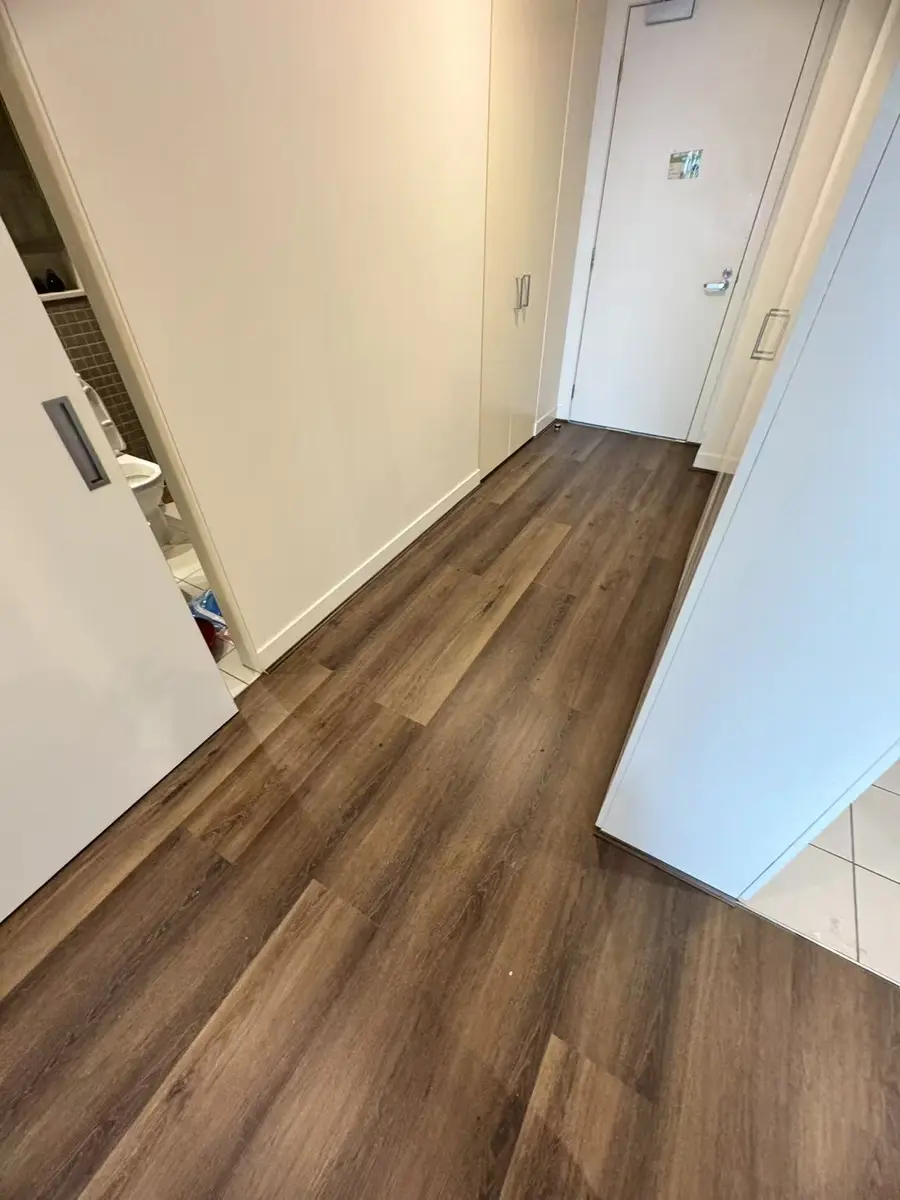
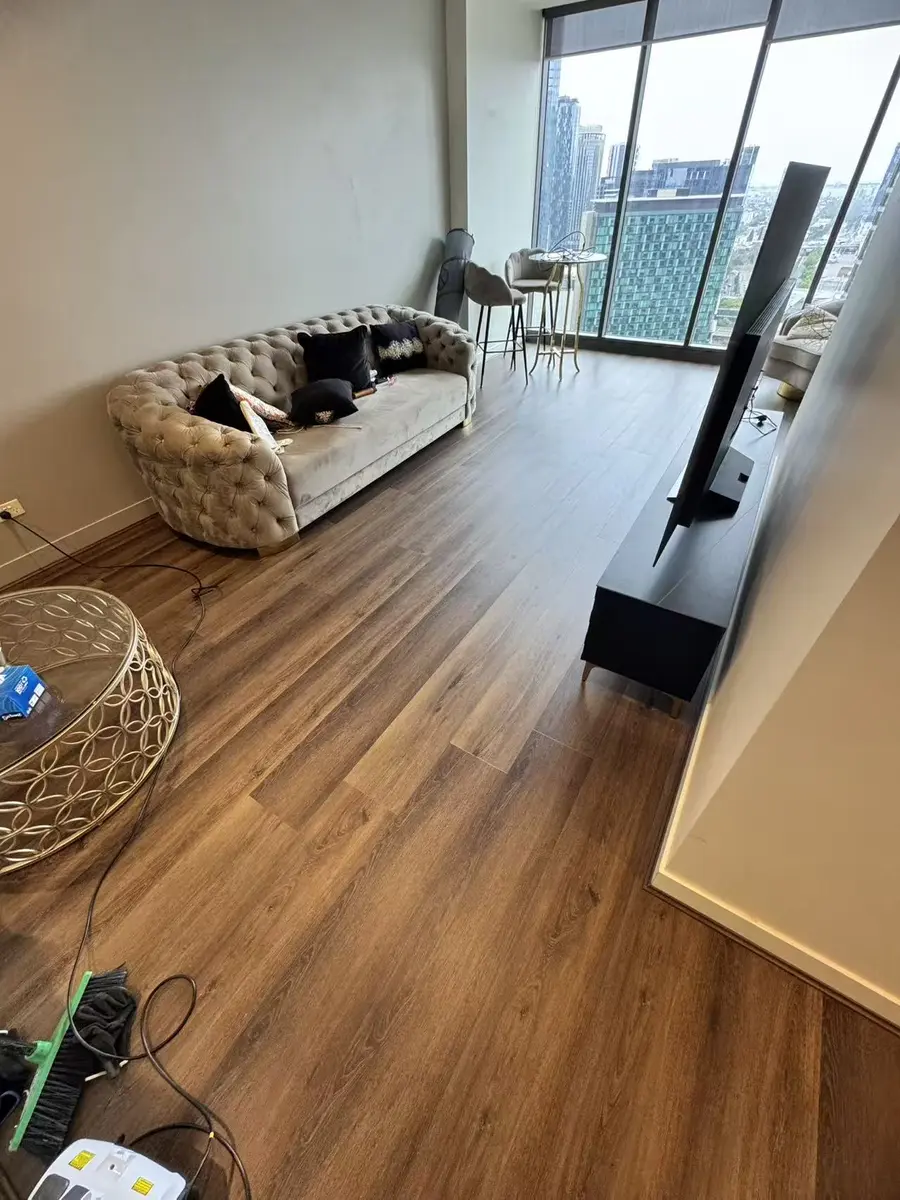
The bedroom and living-room photographs show tools and flooring installation in progress. The hallway photograph shows a completed dark floor section in the same apartment, giving a view of both the fitting stage and finished circulation area.
Bedroom flooring shown during final installation and clean-up.
Installation in progress
Bedroom flooring shown during the final fit-out stage.
Completed work
A continuous dark floor finish through the hallway.
Installation in progress
Living-area flooring shown near completion.
Have a similar gate, cabinet, window or outdoor timber problem? Send your job details through the form, then email clear photos separately.Ask about your carpentry project
Quote preparation guide
Choose a project and collect useful details
Choose the closest project type below to see which photos, measurements and details to gather before requesting a quote.
Flooring project
Show each room, doorway transition, damaged area and the flooring product if already selected.
A clear brief does not need technical language. It only needs enough context to understand the damage, the work requested and what needs checking before a quote.
01Exact Brisbane suburb and postcode
02What is damaged or what should be installed
03Clear photos and approximate dimensions
04Access, parking or height considerations
05Preferred result and timing
Ready to send the brief?
Prepare an email and attach your photos
The quote form securely sends your job details to our enquiry team, and photos can be emailed separately.


 Before fitting
 Completed fitting
 Completed fitting
 Completed fitting